
Let's be honest with each other.
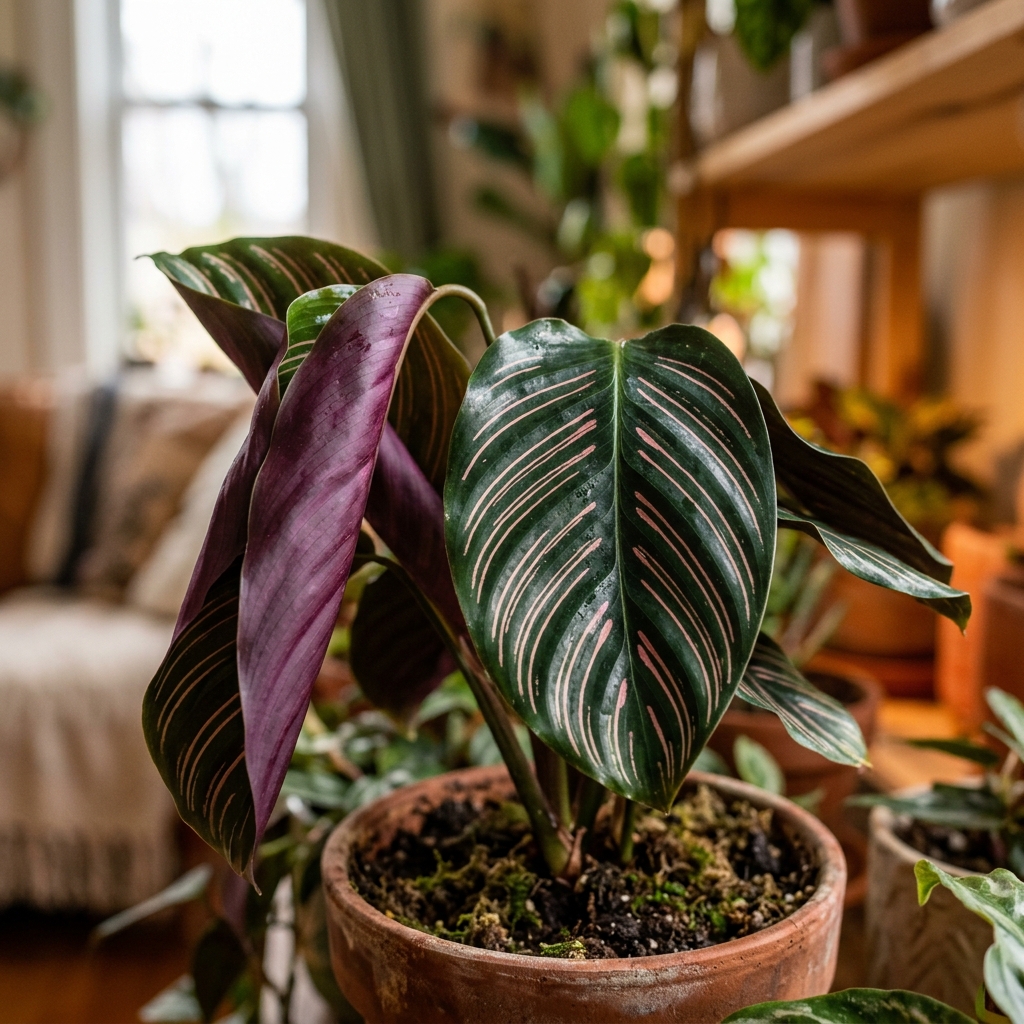
You bought the Calathea because the leaves looked like someone had painted them by hand — dark green velvet with rose-pink pinstripes, deep purple undersides, patterns that seem almost too deliberate to be real. You brought it home, put it in a nice spot, watered it reasonably, and within three weeks it looked like it was staged for a funeral.
Crispy edges. Curling leaves. Possibly some dusty webbing if things really went sideways.
Here's the thing: it is not your fault. Calatheas and their close cousins, Marantas (prayer plants), have one of the highest "Distress Indexes" in the houseplant world. They will throw a full tantrum over tap water. They will sulk dramatically if the air is dry. They will proactively invite spider mites to dinner when stressed. Plant influencers will tell you they're "rewarding" — and they are, eventually — but only once you've cracked their very specific code.
This is that code.
Step 1: Step Away from the Tap
This is not a suggestion. The number one reason your Calathea has crispy brown edges is your tap water. Full stop.
Calatheas evolved in tropical rainforests where the only water they ever received was pure, soft, mineral-free rainfall. They are biologically unprepared for the cocktail of fluoride, chlorine, and heavy minerals in municipal tap water. What happens when they receive it? The plant treats those minerals as toxins — because to it, they are — and actively pushes them to the outer edges of its leaves to protect the core tissue. Those brown crispy tips you hate? That's the plant performing chemical triage on itself, leaf by leaf.
🚫 Myth-Bust: Letting Tap Water Sit Out Overnight
Leaving tap water out for 24 hours does allow chlorine gas to dissipate — but it does absolutely nothing to remove fluoride or dissolved mineral salts. If you're doing this and still seeing crispy tips, you now know why. The fluoride is still there.
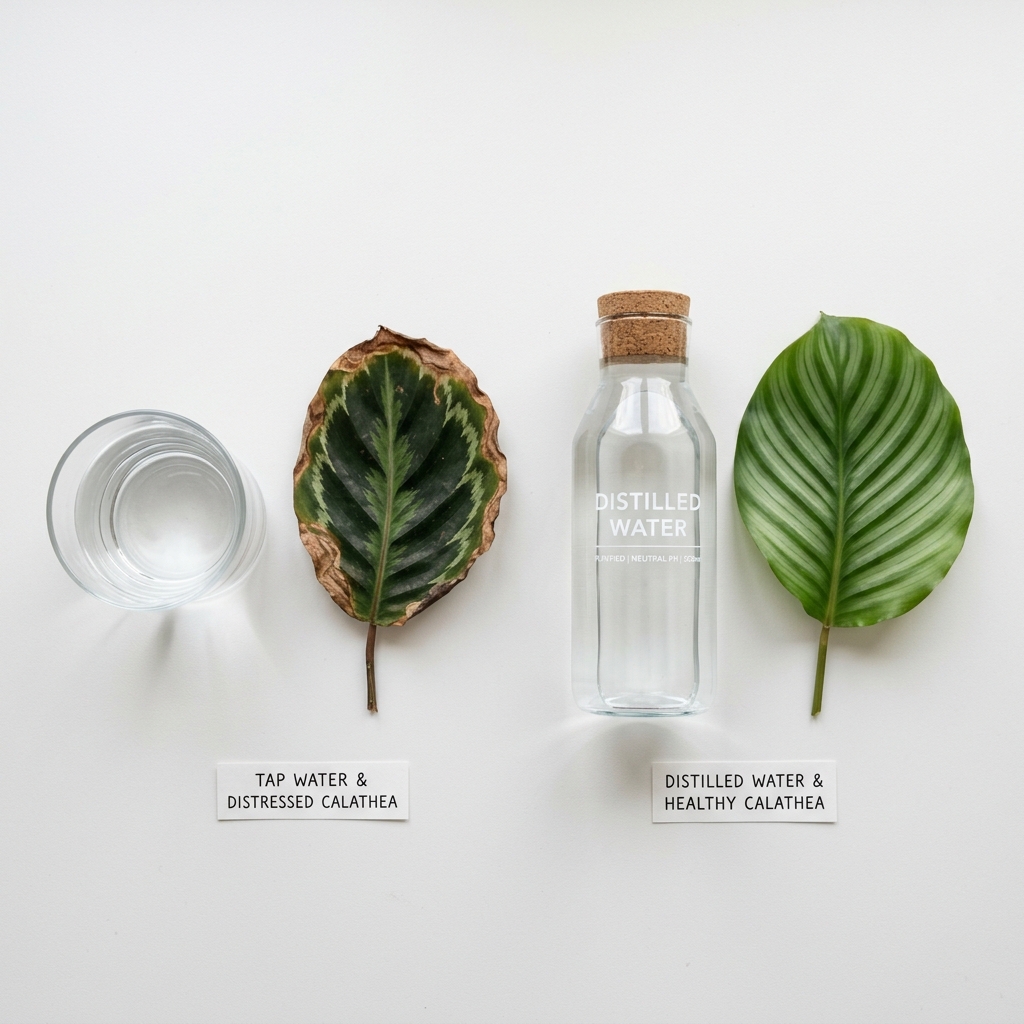
The fix: Switch to one of these and never look back:
- Distilled water — available cheaply at any grocery store, the gold standard
- Reverse osmosis (RO) water — if you have an RO system at home, use it
- Collected rainwater — free and literally what they evolved to drink
Zero exceptions. Once you switch, existing crispy edges won't reverse (that tissue is gone), but new growth will come in clean-edged and healthy.
Step 2: Stop Misting. Seriously, Stop.
This one stings because misting feels so right. You're standing there with your little spray bottle, giving your plant a rain forest experience, feeling like an attentive plant parent. And your Calathea is still curling. Why?
Because misting raises ambient humidity for approximately 10 minutes — and then it's gone. The droplets evaporate, the air goes back to the same 35–40% humidity it was at before, and your plant is exactly where it started, except now its leaves have small water droplets sitting on them that can, over time, create the conditions for fungal leaf spot. Misting is busywork. It does not solve the problem.
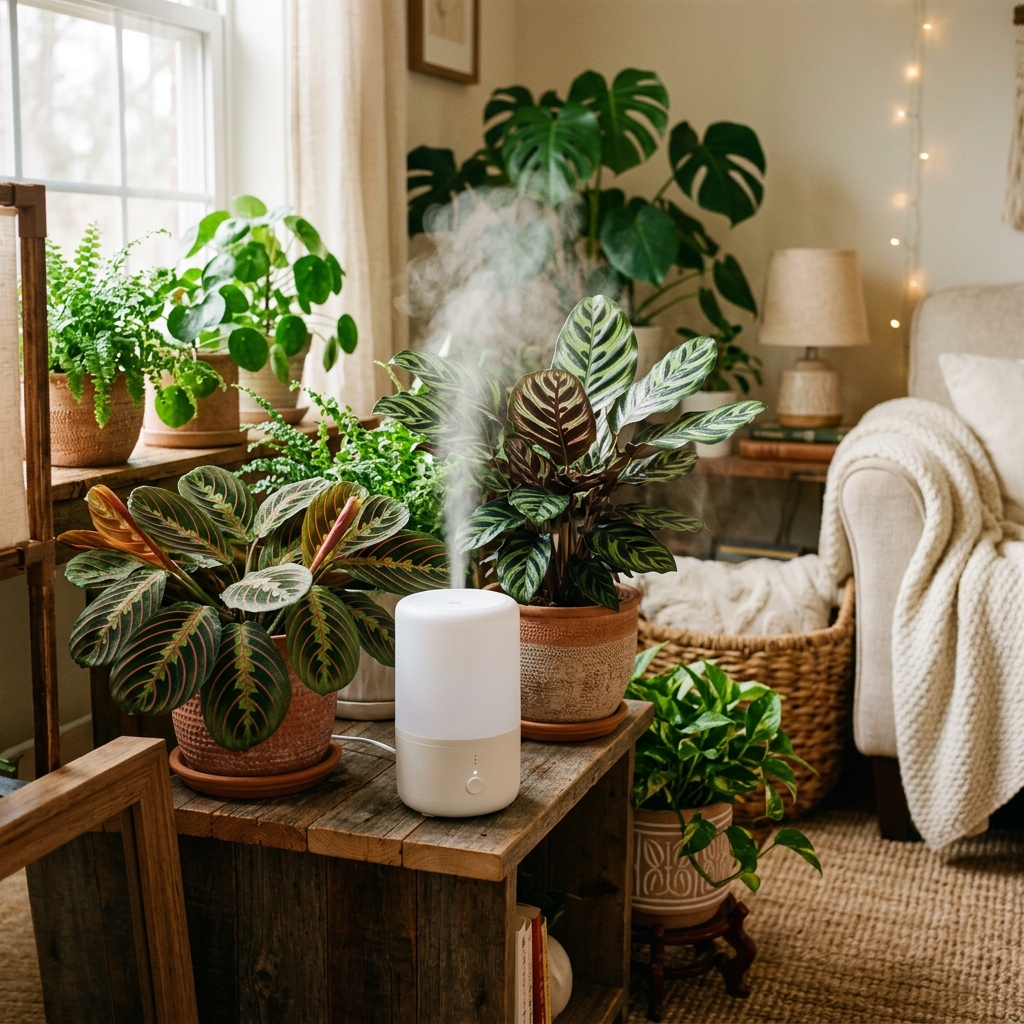
Calatheas need sustained ambient humidity of 60% or higher. Here's how to actually achieve that, in escalating commitment level:
| Level | Method | Humidity Boost | Verdict |
|---|---|---|---|
| 1 | Misting daily | ~10 minutes | ❌ Don't bother |
| 2 | Group plants together | +5–10% in micro-climate | ⚠️ Helps a little — free |
| 3 | Pebble tray with water | +3–7% | ⚠️ Marginal — free |
| 4 | Dedicated room humidifier | +20–40% sustained | ✅ The real MVP |
| 5 | Greenhouse cabinet / terrarium | 70–90% controlled | ✅ End-game for Calathea collectors |
If you're serious about keeping Calatheas long-term, a room humidifier is the single best investment you can make. Run it in the room where your plants live, keep a cheap hygrometer nearby to monitor levels, and stop worrying about misting forever.
Step 3: The "Moist But Not Soggy" Tightrope Walk
Here is the paradox that breaks most Calathea owners: let the soil dry out completely and the leaves crisp up and curl inward defensively. Keep the soil constantly wet in dense nursery peat and the roots rot within two weeks. Both failures feel like the same problem — a dying plant — which makes the diagnosis confusing.
The answer isn't a magic watering schedule. It's your soil structure.
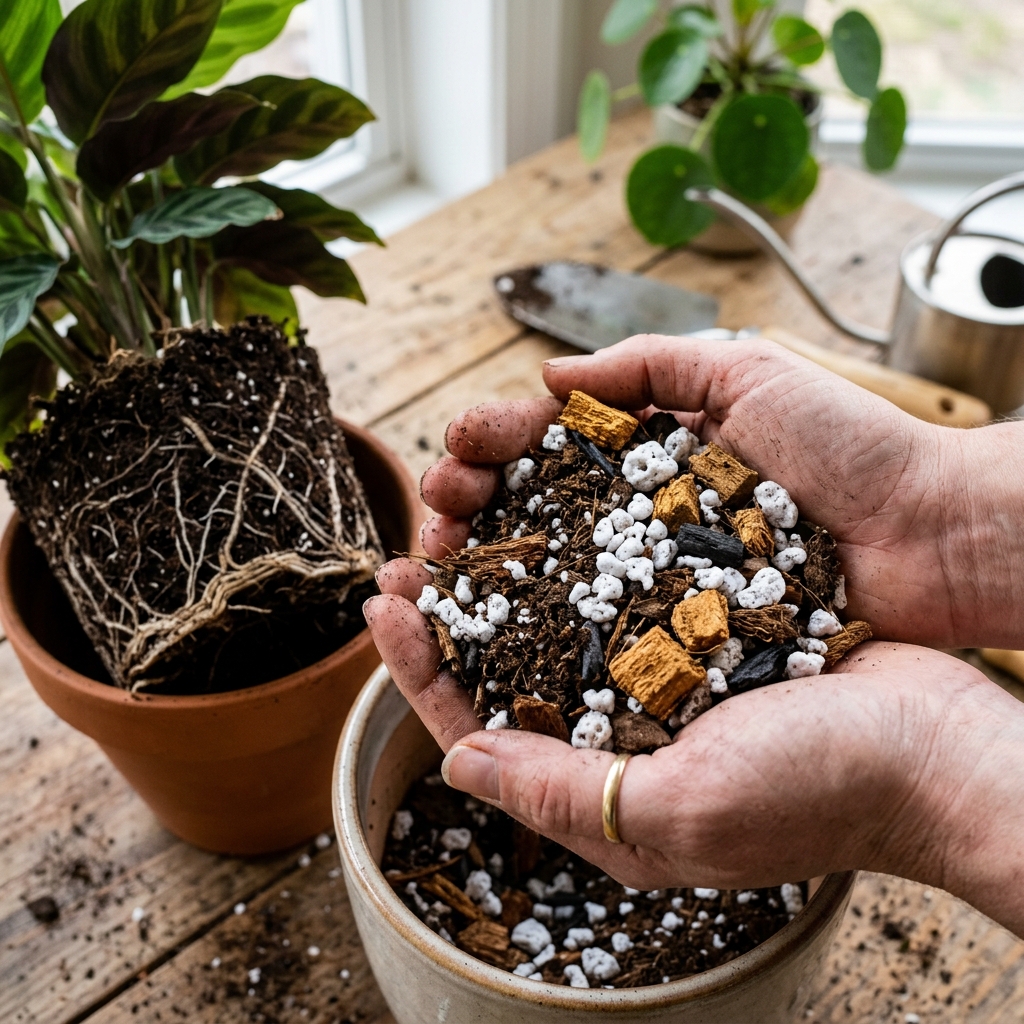
The problem with standard nursery peat mix is that it compacts completely when wet, eliminating all air space around the roots. Calathea roots need both moisture and oxygen simultaneously — the same way they'd get it in the loose, litter-rich floor of a rainforest. Compacted peat gives them moisture but suffocates the roots.
Sprouty's Calathea Soil Recipe:
- 50% quality indoor potting mix
- 30% perlite (creates drainage channels and air pockets)
- 20% orchid bark or coco coir (adds structure, retains slight moisture without compacting)
With this mix, you can water thoroughly — until water runs freely from the drainage hole — and the chunky structure ensures roots stay oxygenated even when the mix is moist. Water again when the top inch of soil feels dry. That's it. No guessing, no paranoia. For a deeper dive on how soil composition affects root oxygen and uptake, see Sprouty's guide on how stagnant root zones destroy plant collections.
Step 4: Decode "Bright Indirect Light" (The Goldilocks Zone)
In the wild, Calatheas and Marantas grow on the floor of dense South American rainforests, under a multi-layered canopy of enormous trees. The light that reaches them is filtered, diffused, and gentle — coming from all directions, never direct. They have never, in millions of years of evolution, expected a direct sunbeam on their leaves.
Direct sun will bleach their signature patterns, scorch the leaf tissue, and cause them to curl tightly inward as a defensive measure. The same dramatic curling you're trying to prevent.
The practical Goldilocks zone:
- ✅ East-facing window — gentle morning light, perfect. Move it right up to the glass.
- ✅ North-facing window — lower light but stable. Calatheas handle this better than almost any other patterned plant.
- ⚠️ South or West-facing window — fine if the plant is 4–6 feet back from the glass, or filtered through a sheer curtain. Direct afternoon sun through South/West glass is too intense.
- ❌ Directly on a sunny windowsill — bleaching and scorching guaranteed.
A note on low light: Calatheas don't need bright light. They'll survive in lower light conditions that would stress many other houseplants. What they won't tolerate is direct sun. If you're choosing between "too dim" and "too bright and direct," go dim. The leaves may grow more slowly, but they won't scorch.
Step 5: The Uninvited Guests — Beating Spider Mites
Here is the formula that produces a spider mite infestation on a Calathea: dry indoor air + any amount of plant stress. That's it. If your plant is already struggling with water quality or humidity, it has weakened cellular defenses, and spider mites — which prefer warm, dry conditions — will find it like it's a five-star resort.
Early warning signs to look for:
- Leaves losing their vibrant color, appearing dull or slightly dusty-looking
- Tiny pale stippling on the leaf surface (mites puncture and suck individual cells)
- Fine webbing where the leaf stem meets the main stalk, or on the undersides of leaves
- Leaves starting to look bronzed or silvery on the undersides
🌿 Prevention vs. Treatment
Prevention: Wipe the leaves (top and underside) monthly with a damp microfiber cloth. This physically removes any mites before they establish a colony, and the increased humidity around the leaf during wiping actively deters them. A well-humidified room is your strongest long-term defence — spider mites cannot build colonies in humid air.
If you already see them: Skip the gentle stuff. Use a thorough spray of insecticidal soap or neem oil concentrate, making sure to coat the undersides of every leaf where mites cluster. Repeat every 4–5 days for at least three cycles — mite eggs are resistant to most treatments, so you're targeting the newly hatched generations. Isolate the affected plant from your collection immediately. For more on diagnosing whether your leaf issues are mites vs. other problems, see Sprouty's plant doctor guide on what's actually causing your leaves to suffer.
Step 6: Give Yourself (and the Plant) Some Grace
Here's what Instagram isn't showing you: even the healthiest, best-cared-for Calathea in the world gets an occasional brown tip. These plants are not furniture. They are living organisms from a habitat so different from your living room that some level of adaptation stress is essentially inevitable.
Unless you live inside a humid conservatory with perfectly soft rainwater falling from the sky, older leaves will eventually develop small brown edges. It is the nature of this particular beast. One or two brown tips on an otherwise thriving plant is a win.
If a brown edge is genuinely driving you crazy, here's the correct technique for trimming it:
- Use sterilized scissors (wipe blades with rubbing alcohol — see our piece on why sterilizing cutting tools matters)
- Follow the natural curve of the leaf when you cut — don't just snip straight across
- Leave a 1mm sliver of brown at the edge — do not cut into the green tissue. Cutting into healthy tissue causes the plant to create a new brown edge at the cut point, defeating the purpose entirely
- That's it. One trim, done, move on
The Survival Protocol: At a Glance
| Problem | Likely Cause | The Fix |
|---|---|---|
| Brown crispy leaf edges | Tap water fluoride/minerals | Switch to distilled or rainwater immediately |
| Leaves curling inward | Low humidity OR underwatering | Get a humidifier (60%+) AND check soil moisture |
| Yellowing / wilting leaves | Root rot from dense soggy soil | Repot into chunky airy mix (perlite + orchid bark) |
| Bleached, faded patterns | Direct or too-intense light | Move back from window or filter with sheer curtain |
| Dusty look, stippling or webbing | Spider mites | Insecticidal soap, every 4–5 days, 3+ rounds |
| Fuzzy white/grey spots on leaves | Powdery mildew (from misting) | Stop misting — see Sprouty's powdery mildew guide |
🌿 Sprouty's Bottom Line
You now have the exact blueprint. Distilled water, a real humidifier, chunky soil, filtered light, monthly leaf wipes, and a little grace for the occasional imperfect tip. A Calathea that gets all six of those things will reward you with movement — literally. Watch it raise and lower its leaves throughout the day as the light changes. That's the prayer plant prayer. That's the payoff for getting this right. It is 100% worth the effort.
Now — drop a comment below with the name you've given your most dramatic Calathea. We know you've named it. Tag us in your recovery progress photos on social media @SproutySpeaks — we genuinely want to see the transformation.
Ready to go deeper on indoor plant care? Start with Sprouty's guide on why your rarest plants actually want you to back off, or if you're new to tropical houseplants, see our honest take on which plants are actually beginner-friendly (spoiler: not succulents).


