
Few sights in the winter and early spring garden match an established camellia in full flush. Whether you grow formal double Camellia japonica cultivars or early-blooming Camellia sasanqua shrubs, their lush waxy blossoms provide vibrant color when the rest of the landscape is bare and quiet. But for millions of home gardeners, that breathtaking display often meets a sudden, heartbreaking end: pristine petals suddenly develop brown water-soaked specks, turn entirely brown and leathery within forty-eight hours, and tumble onto the ground as soggy, ruined disks.
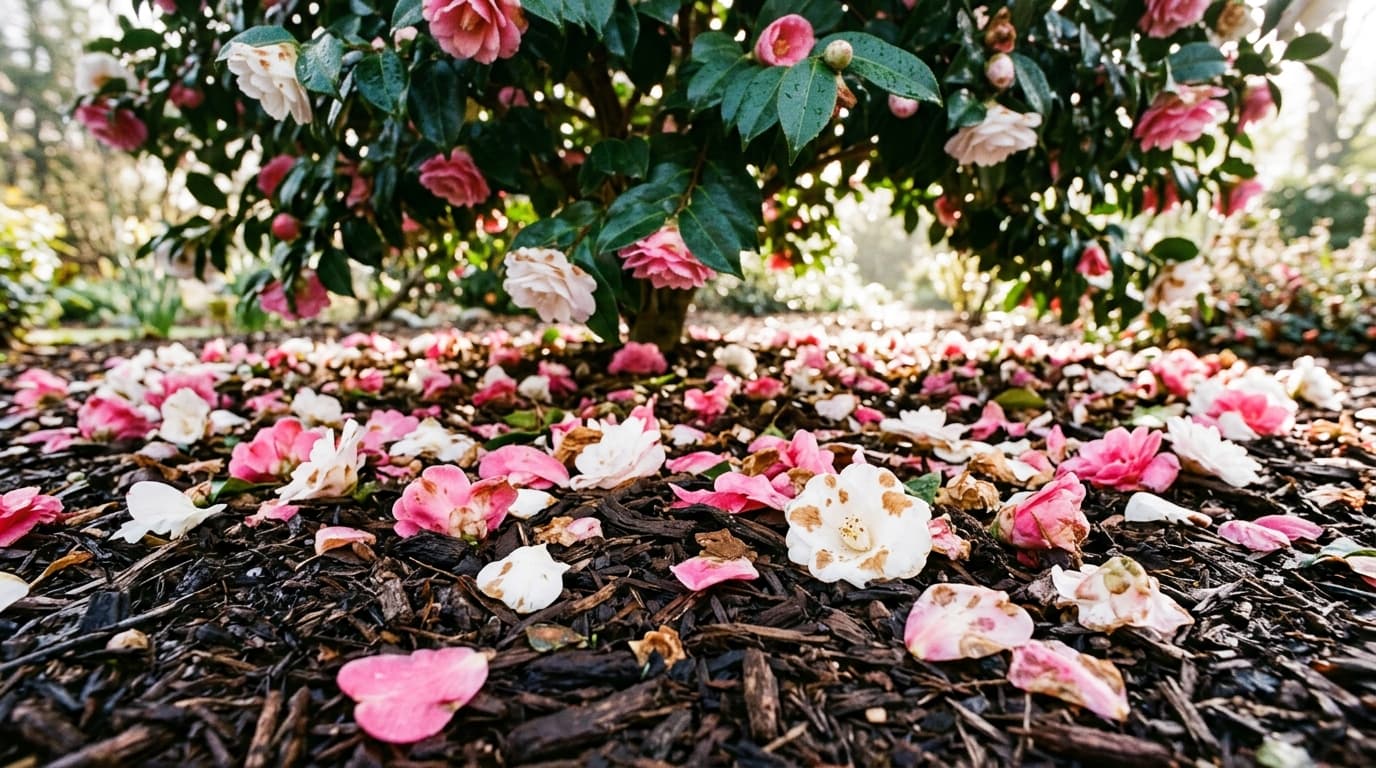
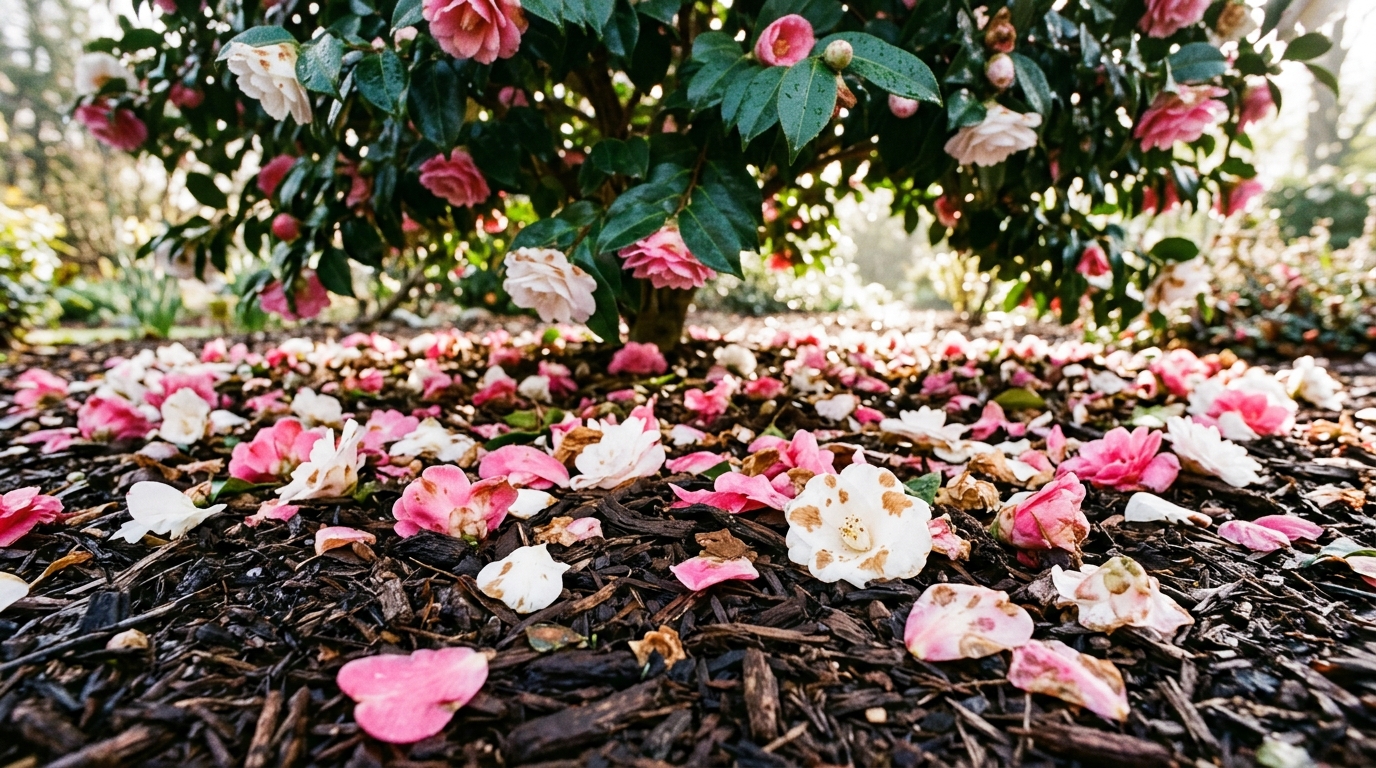
When dozens of brown flowers litter the mulch under the shrub, the natural instinct is often to leave them alone. Gardeners assume that fallen floral petals will simply rot away into harmless compost or nourish the root zone like autumn leaves. But leaving fallen camellia flowers on the ground is the single fastest way to guarantee that camellia petal blight (Ciborinia camelliae) will return to ruin your shrubs next year—and the year after that.
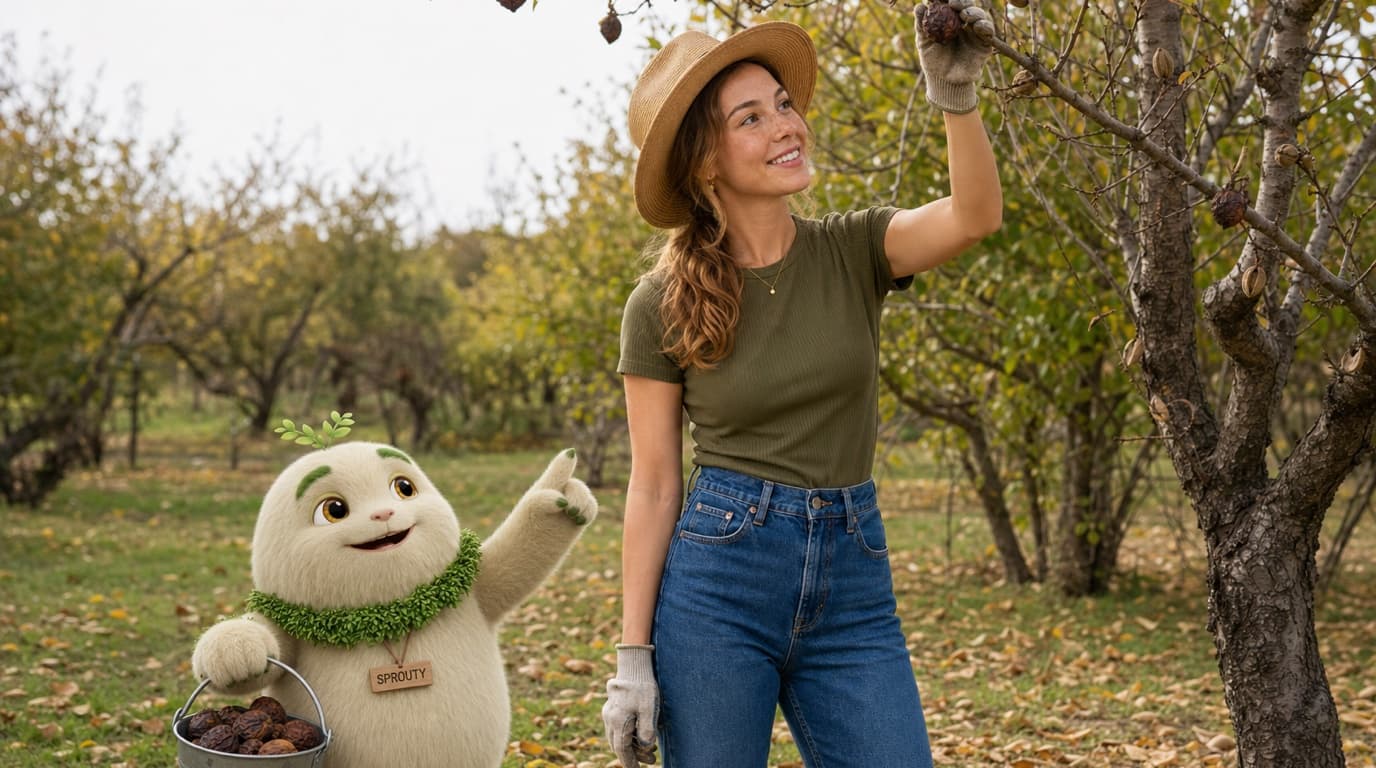
That exact scenario played out in Sophie's garden this week. Staring down at dozens of fallen, browning camellia blossoms scattered over the wood mulch beneath her shrub, Sophie sighed and prepared to walk away. Before she could take another step, Sprouty stepped in to stop the cycle:
Sophie: (Pausing on the garden path, looking down at fallen brown-speckled camellia blossoms scattered over the mulch, about to turn away) "They've already fallen off the shrub... I'll just leave them to melt naturally into the mulch."
Sprouty: (Gently waving a paw and gesturing urgently to the dropped blooms) "Don't walk away, Sophie! Leaving fallen camellia flowers on the ground keeps petal blight cycling year after year. Pick them up!"
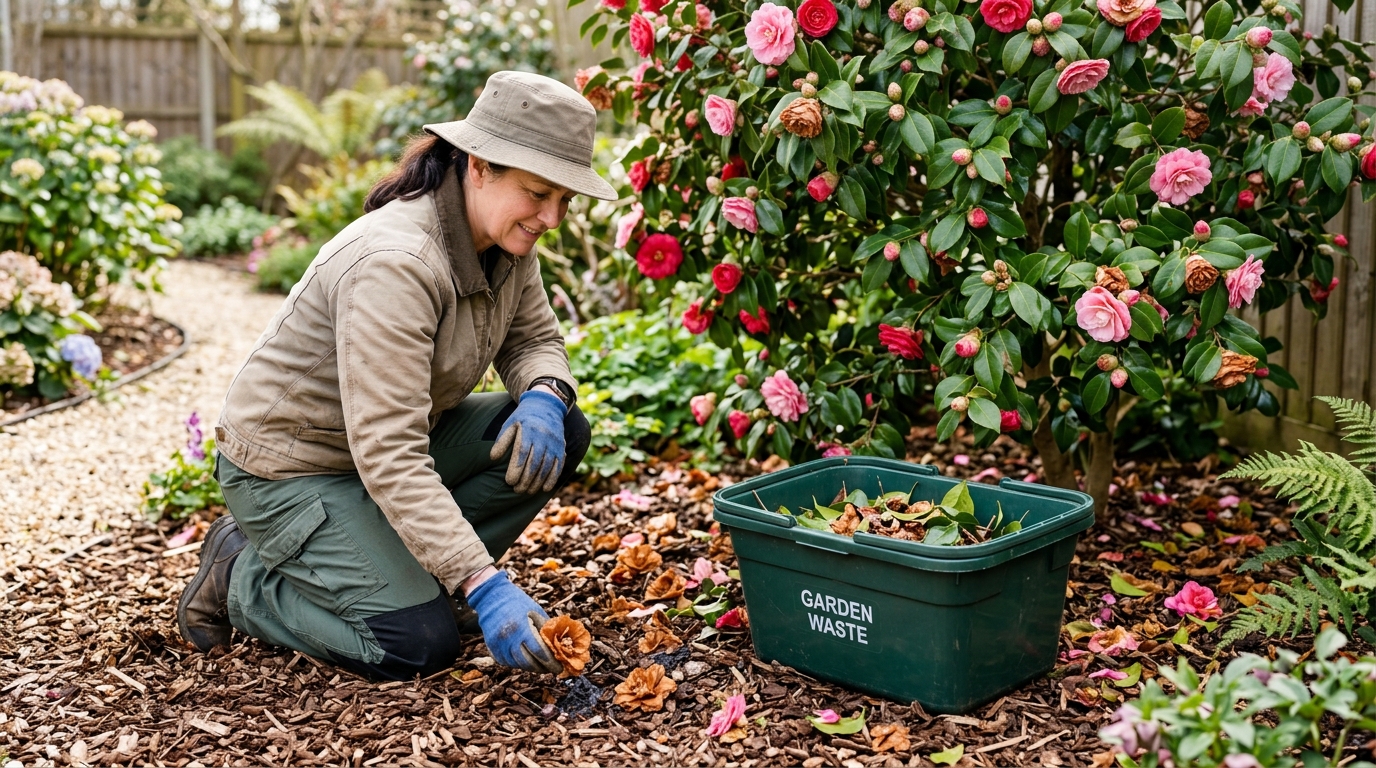
Sophie: (Grabbing her garden cleanup bucket and gathering the dropped blossoms) "Got it! Picking them up breaks the fungal cycle before spores can reinfect next year's blooms."
🌸 On-Screen Lesson: Never leave fallen camellia flowers on the ground! Collect dropped blossoms immediately and discard them away from camellias to break the petal blight cycle.
Watch Sprouty & Sophie on Camellia Sanitation
See why collecting dropped blossoms stops petal blight from cycling in our quick video companion.
What Is Camellia Petal Blight? (The Pathogen Behind the Rot)
Camellia petal blight is caused by the specialized fungal pathogen Ciborinia camelliae. Unlike generalist garden molds that infect decaying wood or soft leafy annuals, Ciborinia is an obligate necrotrophic parasite that exclusively targets the floral tissues of camellias. The evergreen leaves, woody stems, root systems, and seed capsules of your shrub are entirely immune; the fungus exists solely to colonize and consume camellia petals.
According to plant pathologists at the University of California Statewide IPM Program, all cultivars of Camellia japonica are susceptible to petal blight. While Camellia sasanqua cultivars bloom earlier in autumn and are infected less frequently in California and other warm climates, they remain potential hosts under favorable cool, wet conditions.
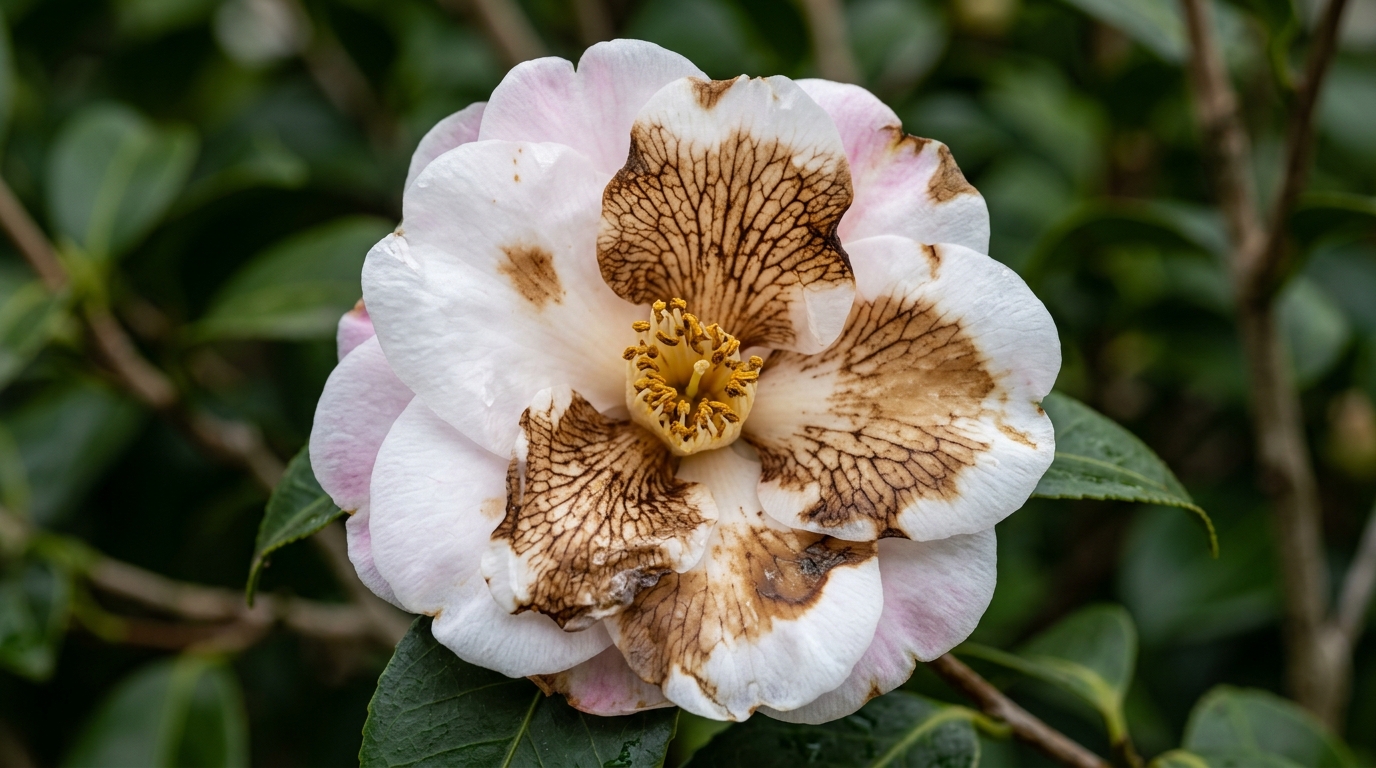
The infection begins invisibly when microscopic airborne spores land on opening buds or expanded petals during periods of mild temperature (59°F to 70°F) accompanied by high humidity, coastal fog, overhead irrigation, or rain. Within hours, the spore germinates, penetrating the tender petal cuticle. Small, water-soaked, irregularly shaped brown blotches appear near the center of the blossom. The rot moves with alarming speed: within 24 to 72 hours, the blotches merge until the entire flower becomes completely brown, dry, and leathery, eventually snapping at the receptacle and falling to the soil intact.
How to Diagnose Petal Blight vs. Frost Damage or Aging
Because camellias bloom during the coldest months of the year, gardeners frequently misdiagnose petal blight as harmless cold burn, frost damage, or ordinary flower senescence. Misdiagnosing the problem is dangerous, because while frost damage ends when the weather warms, fungal petal blight builds up an infectious reservoir in your soil.
Extension plant pathologists at Washington State University Extension (WSU Hortsense) point out three diagnostic symptoms that reliably separate Ciborinia petal blight from other bloom injuries:
- Prominent Dark Brown Netted Veins: As petal blight invades flower tissue, the petal veins turn a distinctly darker shade of brown than the surrounding necrotic petal flesh. This gives infected petals a characteristic "netted" or lattice-like vascular pattern that neither cold frost nor natural aging produces.
- Central Initiation: Petal blight infections usually start as specks near the center or base of the flower petals where moisture collects. In contrast, frost damage, wind scorch, and chemical burns always appear first on the outer margins and tips of the petals.
- Leathery, Cohesive Texture: Blighted camellia blossoms remain intact and leathery. Unless soaked by rain, they do not turn slimy or disintegrate into mush. Furthermore, unlike gray mold (Botrytis cinerea), Ciborinia does not produce masses of superficial gray fuzzy spores on the petal surface.
The Biological Cycle: How Sclerotia Overwinter in Soil and Mulch
Understanding why you must never leave fallen camellia flowers under the shrub requires looking closely at how Ciborinia camelliae survives from one growing season to the next. The fungus has evolved a survival mechanism that mirrors the mummification cycle seen in fruit orchards:
1. Sclerotium Formation at the Blossom Base
When a blighted flower reaches the end of its parasitic stage, the fungus stops expanding across the petals and concentrates its energy at the very base of the flower. There, in the tissues replacing the calyx lobes, the fungal mycelium aggregates and hardens into a dense, dark, rock-hard fungal survival structure called a sclerotium (plural: sclerotia). These sclerotia range in size from 1/12 inch to nearly a full inch in diameter, often fusing into a black, curved crust that conforms to the shape of the flower base.
2. The Multi-Year Soil Reservoir
When the dead blossom drops to the ground, the flower petals eventually decay or disintegrate, but the hard sclerotium does not. It settles into the top layer of organic mulch, leaf litter, or native topsoil beneath the shrub canopy. Plant pathologists at UC IPM have documented that these sclerotia can lie dormant in the soil for three to five years, completely impervious to winter freezes, summer droughts, and biological breakdown.
3. Spring Spore Launch (Apothecia)
During winter and early spring, environmental cues—specifically moist soil and soil temperatures between 50°F and 65°F—trigger dormant sclerotia to germinate. Each sclerotium sends up one or more tiny, light brown, saucer-shaped, inverted mushroom-like structures called apothecia (typically 1/5 to 3/4 inch in diameter). These apothecia are miniature spore cannons. When relative humidity shifts or a gentle breeze passes, the apothecia forcibly eject millions of microscopic ascospores straight upward into the air currents beneath the camellia canopy.
If new flower buds are opening above, the airborne spores land directly on wet petals, completing the cycle and starting the infection all over again. In short, leaving fallen flowers under your shrub is the biological equivalent of planting fungal landmines directly beneath next season's blooms.
The Sanitation Protocol: How to Break the Blight Cycle Step-by-Step
Because Ciborinia camelliae cannot infect leaves or stems and cannot spread directly from flower to flower without the soil-sclerotia stage, strict physical sanitation is the single most effective control method. Just as with picking up fallen diseased fruit in home orchards, clearing dropped pepper fruit to halt weevil larvae, and removing canopy mummies after harvest, rigorous cleanup breaks the pathogen's reproductive chain. Here is the step-by-step garden protocol recommended by university extension specialists:
Step 1: Hand-Pick Infected Blooms from the Shrub
Do not wait for infected flowers to tumble to the ground on their own. Inspect your camellia shrubs twice a week during the peak bloom window. As soon as you spot petals showing brown specks or early netting, grasp the blossom firmly at the base and twist or snip it off the branch before the hard sclerotium at the flower calyx has time to fully mature.
Step 2: Collect All Dropped Flowers Immediately
Make a habit of raking or hand-collecting every fallen flower from the mulch, groundcover, and soil beneath your camellia bushes. Check under low-hanging branches and behind the shrub where petals easily hide. The faster you remove dropped flowers, the fewer sclerotia will separate from the blossoms and burrow into the underlying soil.
Step 3: Dispose Away from Camellias (Never Compost into Garden Mulch!)
Place collected blossoms directly into heavy paper or plastic yard-waste bags destined for municipal municipal composting or municipal landfill disposal. Never toss blighted camellia flowers into your backyard compost bin! As detailed in our guide on why diseased plant tissue survives in cool compost piles, killing resting fungal propagules like Ciborinia sclerotia requires continuous, uniform temperatures exceeding 140°F to 165°F throughout the entire pile. Typical home compost piles rarely reach or maintain those temperatures at the edges, meaning any compost spread back into your garden beds will re-infect your camellias.
Step 4: Maintain a Fresh 4-Inch Layer of Pathogen-Free Mulch
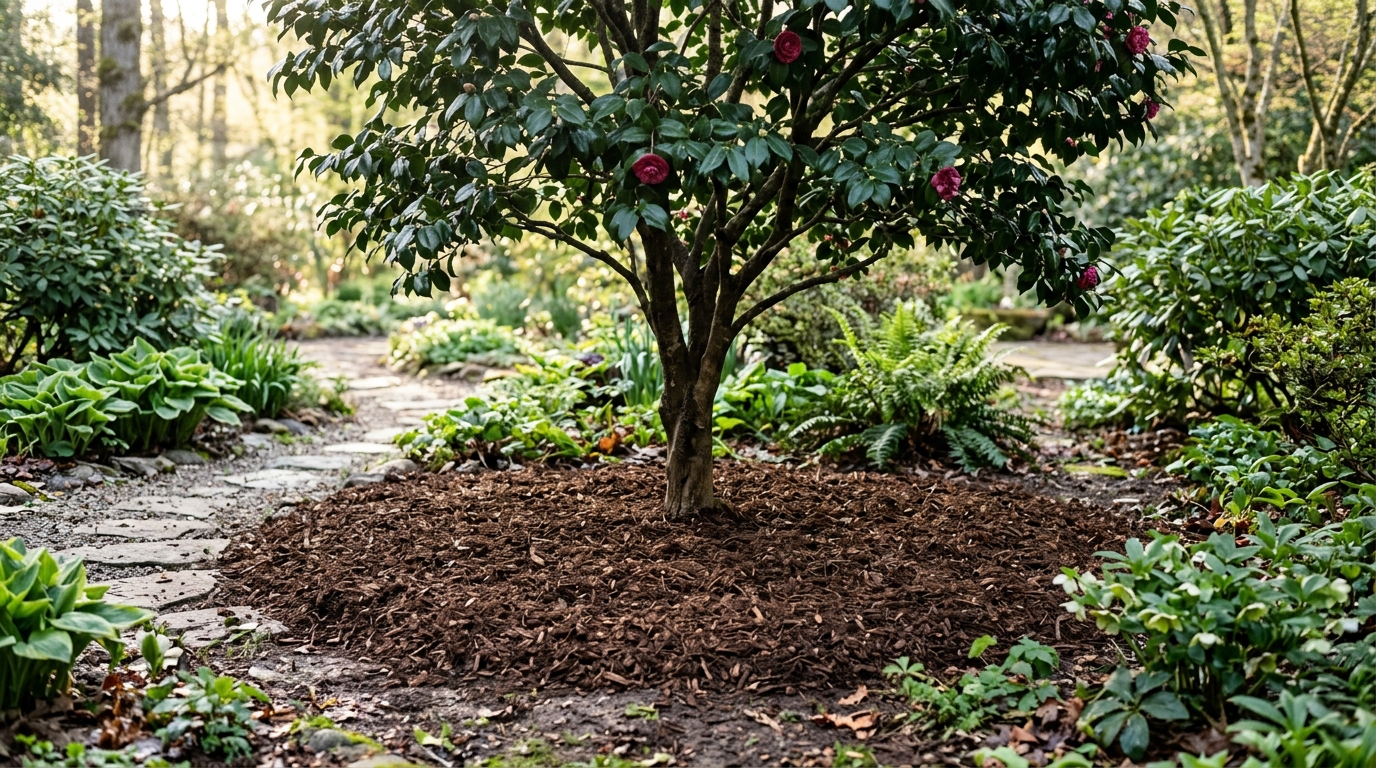
Both UC IPM and Washington State University recommend maintaining a 4-inch layer of clean, coarse organic mulch (such as bark chips or arborist wood chips) over the soil beneath and slightly beyond the drip line of camellia shrubs after the bloom season concludes. A 4-inch blanket acts as a physical barrier: when sclerotia buried in the soil germinate and produce apothecia, the fruiting bodies cannot penetrate four inches of coarse wood chips to reach open air, trapping the spores beneath the mulch layer and dramatically reducing airborne inoculum.
⚠️ Vital Mulching Caution: Avoid the "Mulch Volcano"
While a 4-inch mulch blanket is vital for suppressing apothecia, you must keep the mulch pulled back 3 to 4 inches away from the shrub's woody trunk. As explained in our guide on why mulch volcanoes rot woody trunks, piling moist organic material directly against woody bark traps moisture, smothers respiratory lenticels, and encourages crown rot. Spread your mulch in a flat donut ring, never a cone against the stems!
Cultural Controls: Irrigation, Airflow, and Nursery Precautions
In addition to physical bloom sanitation and deep mulching, several simple cultural adjustments will substantially reduce petal blight pressure in your landscape:
- Eliminate Overhead Irrigation: Ciborinia ascospores cannot penetrate dry petal tissue; they require free water on the bloom surface to germinate. Water camellias exclusively at ground level using drip emitters, soaker hoses, or low-pressure bubblers positioned under the mulch layer. Never run overhead sprinklers or spray hoses onto flowering shrubs.
- Improve Canopy Airflow: High humidity pockets encourage spore germination. Selectively thin dense, crossing interior branches after bloom season finishes to promote breeze penetration and accelerate petal drying after morning dew or rainfall.
- Inspect New Nursery Containers: One of the primary vectors introducing petal blight into previously clean gardens is containerized nursery stock. When purchasing new camellias, inspect the soil surface for fallen petals or dark sclerotia. Extension specialists recommend scraping away and discarding the top 1 to 2 inches of potting mix from newly purchased container plants and replacing it with fresh, pathogen-free potting soil before planting in your landscape.
- Fungicide Realities: While preventative fungicides containing thiophanate-methyl or mancozeb are labeled for camellia flower blight, they must be applied repeatedly as every new flower bud opens to protect petal surfaces. For home gardeners, chemical sprays are labor-intensive, costly, and ineffective on their own. University research confirms that strict sanitation—gathering dropped blossoms and maintaining clean mulch—delivers far superior, sustainable control without chemical reliance.
Frequently Asked Questions About Camellia Petal Blight
Can camellia petal blight kill my bush?
No. Ciborinia camelliae is an obligate floral pathogen that exclusively infects petal tissue. It does not invade woody branches, foliage, or root crowns, and will not directly kill the shrub. However, severe annual infections destroy the ornamental value of your plant by turning every blossom into brown mush before it can fully open.
Why can't I compost fallen camellia blooms in my home pile?
Blighted camellia blossoms contain dense fungal sclerotia at their base that survive extreme environmental stress. To deactivate sclerotia, compost piles must maintain continuous, uniform internal temperatures of 140°F to 165°F throughout the entire mass. Home compost piles rarely reach or sustain these temperatures, meaning the fungus will survive in finished compost and reinfect your garden beds.
How do I know if brown camellia petals are from frost or petal blight?
Look closely at the petal veins and the pattern of browning. Petal blight causes prominent dark brown netted veins that run like a lattice through lighter brown tissue, and the infection typically starts near the center of the bloom. Frost damage causes uniform browning that starts exclusively on the outer edges and tips of petals, with no dark netted veins.
Does picking up fallen flowers really stop petal blight?
Yes. Because the fungus relies on sclerotia forming at the base of fallen flowers to overwinter in soil and shoot spores the following spring, picking up and destroying blossoms removes the reproductive structures before they can colonize your garden bed. Within two seasons of diligent sanitation and fresh mulching, infection rates drop dramatically.
Related Plant Health & Garden Sanitation Guides
Proactive sanitation is the secret to pest- and disease-free gardens. For more expert guidance on managing landscape hygiene, check out our companion guides on why orchard sanitation breaks the fungal loop with fallen fruit, see why garden sanitation stops pepper weevil larvae from multiplying, learn why canopy mummies keep orchard pests cycling, discover why plant pathogens survive in cool compost under 165°F, and read why mulch volcanoes rot woody trunks. For seasonal timing advice, explore our Seasonal Tips & Fall Cleanup Playbook, check local freeze windows with the Frost & Heat Date Planner, and read our comprehensive Ultimate Guide to Natural Pest & Disease Control.
References & Scientific Extension Sources
- UC Statewide Integrated Pest Management Program (UC IPM): Camellia Petal Blight (Ciborinia camelliae) Identification & Management — University of California Agriculture and Natural Resources.
- UC Statewide IPM Program (Commercial Floriculture & Nurseries): Camellia Flower Blight Management & Sclerotia Biology — UC ANR Publication.
- Washington State University Extension (WSU Hortsense): Camellia: Flower and Petal Blight Biology & Non-Chemical Management — WSU College of Agricultural, Human, and Natural Resource Sciences.