
❄️ Winter Gardening Guide
December–February · Winter is the gardener's secret weapon. While the garden sleeps, the most productive gardeners are planning, learning, and growing indoors. Use this quiet season well and you'll hit spring fully prepared.

🌱 Sprouty's Winter Reminder
All gardening is local! These tips are general guidelines — always check your specific USDA hardiness zone and local frost dates for the most accurate planting schedules.
Plan Your Garden Layout
⏱ December–January — the quieter, the better for deep thinking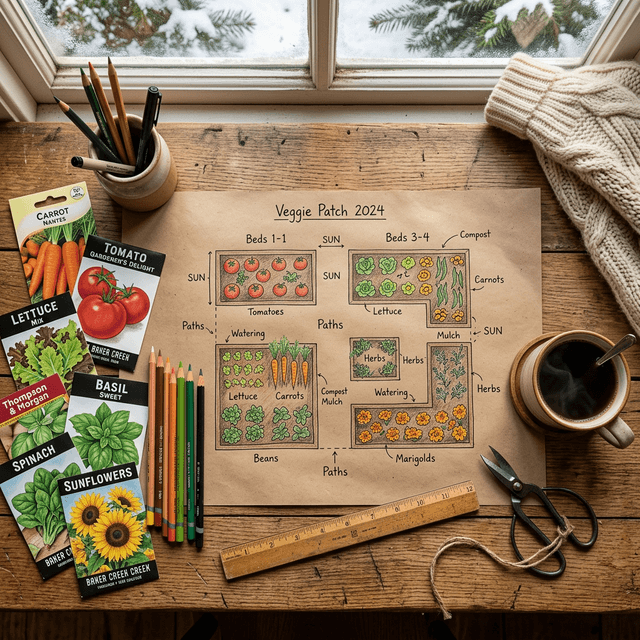
The difference between a good garden and a great garden is often made in January — not May. Planning on paper is free, reversible, and lets you make every mistake without a single plant suffering. A few evenings with graph paper and a pencil can save you months of frustration.
Use graph paper or a free online garden planner. Measure your beds and note their orientation (N/S/E/W). Mark permanent structures, trees, and anything that casts significant shade. Getting scale right prevents the classic mistake of cramming too many plants into too little space.
Never grow the same plant family in the same bed two years in a row. Rotate in this pattern: nightshades (tomatoes, peppers) → legumes (beans, peas) → brassicas (broccoli, kale) → roots (carrots, beets) → back to nightshades. This breaks pest and disease cycles that overwinter in soil.
A bed that's sunny in April may be shaded by a full-leafed tree in July. Note sun patterns throughout the day — full sun means 6+ hours of direct sunlight. Vegetables need sun; most flowers and herbs tolerate part shade.
Put tall crops like corn, pole beans and trellised tomatoes on the north side of a bed so they don't shade shorter plants. Keep thirsty crops together so one watering schedule fits the whole bed, and leave room to reach every plant without stepping on the soil.
Write your last spring frost date and first fall frost date on the top of your planning sheet (Sprouty's free Frost & Heat Planner estimates both from your ZIP). Work backward: what needs to be started indoors, and when? What can be direct-sown, and when does it go in the ground? A concrete calendar prevents the spring scramble.
Plan one project you've never tried: a pollinator border, a raised herb spiral, a vertical trellis, a small fruit tree. Winter is when ambition is free. Committing it to paper makes it real.
| Timing | What to Start |
|---|---|
| December | Sketch bed layouts, plan crop rotations, order new tools/supplies |
| January | Finalize seed orders; build or repair beds if weather allows |
| February | Start earliest seeds (onions, leeks, peppers) indoors under lights |
| Late Feb/March | Start tomatoes; set up grow light station; prep potting mix |
| March–April | Direct sow cool-season crops once soil is workable |
📍 Keep your planning journal all season — note what worked, what failed, and variety names. Future-you will be deeply grateful.
Protect Plants Outdoors
⏱ December–February — after storms, before cold snapsWinter isn't only for planning indoors. A few small outdoor jobs protect trees, shrubs and tender plants from snow, ice, frost and hungry rodents — and in mild-winter areas, the garden keeps growing all season.
Heavy snow and ice can break branches. After a storm, use a broom to push sagging limbs gently upward and shake the snow loose. Bent branches often spring back once the snow melts.
Pull winter mulch about 6 inches back from tree trunks, like a donut. Mulch piled against the bark can lead to roots that circle and girdle the tree, and gives mice and voles cover right next to the trunk.
Disconnect garden hoses from outdoor faucets, drain them, and store them out of the weather so water can't freeze inside the hose or the faucet.
Late winter is the usual time to prune most fruit trees and summer-blooming shrubs while they are dormant. Spring bloomers like lilac, forsythia and bigleaf hydrangea already carry this year's flower buds — wait to prune them until right after they bloom.
In mild-winter areas, drape frost cloth or an old sheet over citrus and other frost-tender plants on nights forecast to freeze. Let it reach the ground to hold in the soil's warmth, and take it off the next morning.
In USDA zones 9–11, winter is cool-season planting time for lettuce, peas, spinach and broccoli. Sprouty's free What to Plant Now tool lists what to sow this month for your ZIP.
Order Seeds & Build Your Wish List
⏱ December–January — before popular varieties sell out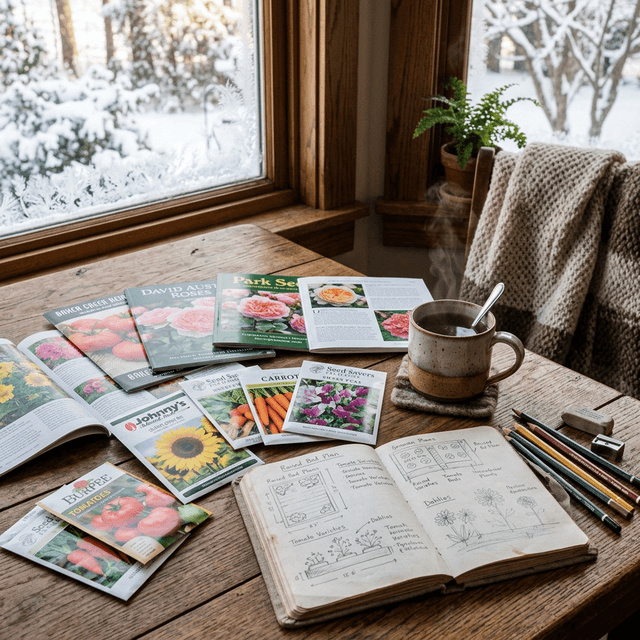
Every year, the same thing happens: gardeners wait until spring, then discover their favourite heirloom tomato or specialty pepper is already sold out. The solution is simple — order in January. Seed shopping is one of winter's great pleasures, and doing it thoughtfully sets the tone for the entire growing season.
Before ordering, check your seed stash. Many seeds stay viable for a few years if stored cool, dark and dry. Test older packets first: sprout 20 seeds on a damp paper towel, fold, and check after about a week. If fewer than 15 come up (75%), buy a fresh packet.
Varieties selected for a climate like yours often perform better than ones bred elsewhere. Seek out seed companies close to your region — they trial varieties locally and sell what actually thrives in your conditions.
Each year, try 1–2 varieties you've never grown. This expands your experience and often turns up a new favourite. Unusual varieties that excite you make gardening more fun and keep the hobby feeling fresh year after year.
Seed packets contain far more seeds than most gardeners need. Split orders with a neighbor or friend — you save money and reduce waste. Many seed companies also sell smaller packets for solo gardeners.
Store unused seeds in sealed glass jars in the refrigerator, labeled with the year purchased. Cool, dry storage slows seed aging, so packets last longer than they would in a warm, humid shed.
| Seed company | Known for | Website |
|---|---|---|
| Baker Creek Heirloom Seeds | Very large heirloom selection; detailed variety notes | rareseeds.com |
| Johnny's Selected Seeds | Professional-quality; excellent for market gardeners; reliable germination | johnnyseeds.com |
| Seed Savers Exchange | Non-profit; rare and heritage varieties; supports seed saving community | seedsavers.org |
| High Mowing Organic Seeds | All USDA certified organic; great germination rates | highmowingseeds.com |
| Territorial Seed Company | Pacific Northwest focus; great cool-season selections | territorialseed.com |
| Pinetree Garden Seeds | Small packets at low prices; perfect for small gardens | superseeds.com |
📍 Order by mid-January for the widest selection. Heirloom tomatoes, coloured cauliflower, and specialty peppers sell out first.
Grow Microgreens, Sprouts & Indoor Herbs
⏱ All Winter — fresh food from your windowsill year-round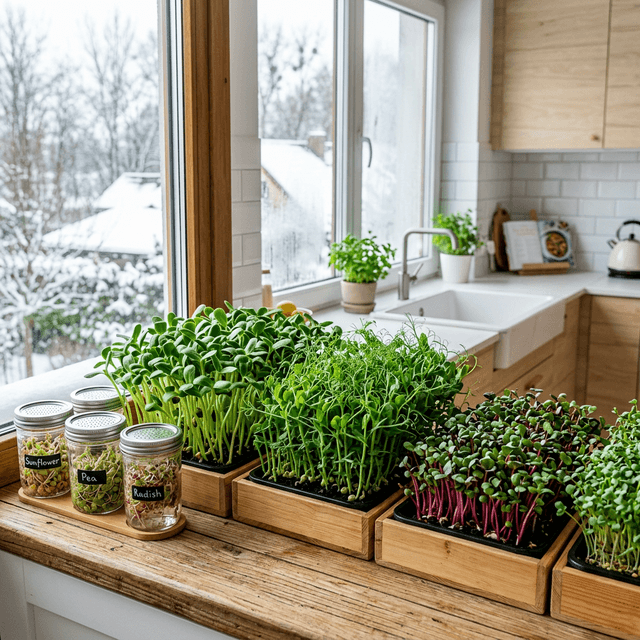
You don't need a garden to grow food in winter. A sunny windowsill or a small grow light can keep you in fresh microgreens, sprouts, and herbs all winter. Microgreens are packed with flavor, and many are ready to cut in 7–14 days.
Sunflower, peas, radish, and broccoli are the most reliable for beginners. They germinate quickly, grow vigorously, and have outstanding flavour. Avoid basil and cilantro when starting — they need warmth and more precision.
Fill a shallow 10"×20" tray with 1–1.5 inches of seed-starting mix or coco coir. Soak larger seeds (sunflower, peas) overnight. Spread seeds thickly — nearly touching — over the surface. Mist with a spray bottle and cover with a second tray for 3–4 days (blackout period).
Covering seeds with a second tray creates pressure and darkness, which dramatically improves germination speed and uniformity. Once you see seeds pushing against the top tray, remove the cover and move to bright light.
Add 2 tablespoons of mung beans, lentils, chickpeas, or alfalfa to a mason jar. Cover with a mesh lid (or cheesecloth). Rinse and drain twice daily. In 4–5 days you have nutritious sprouts — no soil, no light required, just water.
The warm, humid conditions that grow sprouts also suit bacteria like Salmonella, Listeria and E. coli. Use seed sold for sprouting, rinse with clean water, and keep finished sprouts in the fridge. The FDA advises young children, older adults, pregnant people and anyone with a weakened immune system to avoid raw or lightly cooked sprouts.
A small 2-bulb LED grow light on a timer (14 hours on) is enough for a productive herb shelf: basil, parsley, chives, cilantro, and mint thrive indoors with supplemental light. Harvest outer leaves frequently to encourage bushy growth.
Cut microgreens at soil level when they're 1–3 inches tall and the first set of true leaves is just beginning to open. This takes 7–21 days depending on variety. Store unwashed in the fridge in a container with a paper towel — they keep 5–7 days.
| Timing | What to Start |
|---|---|
| 7–10 days | Radish, mustard, arugula microgreens |
| 10–14 days | Sunflower, pea, broccoli, kale microgreens |
| 14–21 days | Basil, cilantro, amaranth microgreens |
| 4–5 days | Mung bean, lentil, alfalfa sprouts (jar method) |
| 3–4 weeks | Potted herbs (chives, parsley) ready to harvest |
📍 Sow a new tray every 7 days for a continuous harvest all winter.
Maintain & Thrive with Houseplants
⏱ All Winter — adjust care for shorter days and lower humidity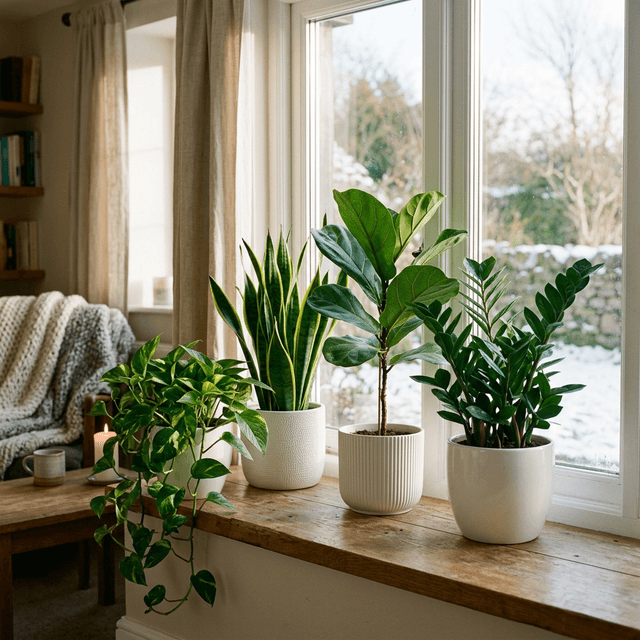
Winter is the season most houseplants are accidentally killed — overwatered by well-meaning owners who don't realise their plants have entered a rest period. The adjustments are simple: less water, no fertilizer, more light, and higher humidity. Here's how to get it right.
Most tropical houseplants are semi-dormant in winter. Their roots absorb water slowly, and soggy soil encourages root rot. Stick your finger 2 inches into soil before watering. Only water when it feels completely dry at that depth — this might mean watering every 2–4 weeks instead of weekly.
Applying fertilizer to a dormant plant is like giving a sleeping person an energy drink — the unused nutrients build up as salts in the soil, which burns roots. Hold fertilizer through the darkest months, then resume in late winter or early spring once longer days bring new growth.
Winter light is 50–75% weaker than summer light even through the same window. Move sun-hungry plants (succulents, cacti, herbs) to your sunniest south-facing window. Dust leaves monthly with a damp cloth — dust reduces light absorption significantly.
Indoor heating drops relative humidity to 20–30% — far below the 50–70% most tropical plants prefer. Group plants together (they create their own microclimate), run a small humidifier nearby, or set pots on pebble trays filled with water (the water evaporates upward).
Low humidity and stressed plants make winter a prime time for spider mites, fungus gnats, and mealybugs. Inspect plants weekly. Treat spider mites with a neem oil mist; let soil dry out completely between waterings to kill fungus gnats; remove mealybugs with a cotton swab dipped in rubbing alcohol.
Winter is an excellent time to take stem cuttings of pothos, philodendron, tradescantia, and other trailing plants. Cut just below a node, remove lower leaves, and place in water or moist perlite. New roots form in 2–4 weeks.
| Plant | Winter note | Care |
|---|---|---|
| Pothos, Philodendron | Any time — forgiving | Cut between nodes; propagate in water. Reduce watering in winter. |
| Snake Plant (Sansevieria) | Rarely needed | Extremely drought-tolerant; water monthly or less in winter. |
| Peace Lily | Drooping is normal signal | Water when leaves just begin to droop — it tells you exactly when it's thirsty. |
| ZZ Plant | Set-and-forget | Stores water in rhizomes; water every 3–4 weeks in winter. |
| Fiddle Leaf Fig | Fussy in winter | Pick one bright spot away from drafts and heater vents, then leave it there — it sulks after moves. Wipe leaves monthly. |
| Succulents & Cacti | Dormant | Minimal water Dec–Feb; move to brightest window; do not fertilize. |
Learn, Research & Build Skills
⏱ All Winter — invest in your knowledge baseEvery hour you spend learning in winter multiplies your gardening results in summer. Professional growers and master gardeners spend as much time studying as they do digging. Winter is your classroom — use it.
Many university Extension services post free webinars and videos on soil, pest management, fruit trees and vegetable growing, and paid course sites cover more specialized topics. Search your state's Extension service first — its advice is written for your climate.
Most US counties have a Cooperative Extension office (part of the land-grant university system) that provides science-based, region-specific gardening advice. Many offer winter workshops, Master Gardener programs, and low-cost soil testing.
Rather than skimming many books, choose one and read it slowly with notes. Classics include "The Market Gardener" (Jean-Martin Fortier), "Teaming with Microbes" (Jeff Lowenfels), "Gaia's Garden" (Toby Hemenway), and "The Vegetable Gardener's Bible" (Ed Smith).
In-person or online garden clubs connect you with experienced local gardeners who know your exact climate, pests, and varieties. Seed swaps in late winter are treasure troves of unusual, locally-adapted varieties you can't buy anywhere.
Track what you planted, when, where, and how it performed. Note unusual weather, pest outbreaks, and variety successes or failures. Even simple notes like "Juliet tomatoes outperformed Sungold this year — more resistant to blight" are invaluable next winter when you're planning again.
Check & Optimise Stored Produce
⏱ All Winter — monthly inspections prevent total loss
A root cellar or cool basement full of homegrown potatoes, squash, onions, and garlic is one of the most satisfying things a gardener can build. But stored produce requires monitoring — one rotten apple really does spoil the barrel. A monthly 15-minute check prevents losing an entire harvest.
Apples and pears emit ethylene gas that accelerates ripening and rotting in other produce stored nearby. Keep them in their own space away from root vegetables and squash. Potatoes stored near apples sprout faster.
Potatoes keep best at 32–40°F with high humidity (about 95%), in complete darkness — light turns them green. Potatoes meant for frying keep better at 40–50°F, since colder storage makes them sweeter and darker when fried. Check monthly and remove any sprouting or soft ones.
Butternut, acorn, and delicata squash want a warmer, drier spot than potatoes: about 50–60°F and 60% humidity. They won't keep in a cold, damp basement. A shelf in a cool spare room often works well.
Onions and garlic keep best cold and dry: 32–40°F with about 65% humidity and good air circulation to prevent mould. Mesh bags or braids keep bulbs separate and aired, and the refrigerator works for long-term storage.
Dried beans, lentils, and whole grains can harbour weevils, especially if purchased in bulk. Store in airtight glass jars — if you spot tiny weevils, freeze the contents for 4 days to kill eggs and larvae, then return to airtight storage. No need to discard them.
Check canned goods, ferments, and dehydrated produce. Bulging or unsealed lids, off smells, or mould are signs of spoilage — never taste it; discard it. Store home-canned jars at 50–70°F and use them within a year for best quality, oldest first.
| Crop | How to store |
|---|---|
| Potatoes | 32–40°F (40–50°F for frying), dark, humid — check monthly |
| Winter Squash | 50–60°F, about 60% humidity — away from apples |
| Onions/Garlic | 32–40°F, about 65% humidity, good airflow |
| Dried Beans/Grains | Airtight glass jars; freeze 4 days if weevils found |
| Canned Goods | 50–70°F dark shelf; use within a year, oldest first |
📍 Monthly inspections take only 15 minutes and can prevent losing your entire harvest with a single rotting item going unnoticed.
Want this month's tasks for your ZIP? Open the Garden Calendar, or browse all four seasonal guides.

Join Sprouty's Garden Club 🌱
Get weekly gardening tips, seasonal planting reminders, and exclusive guides delivered straight to your inbox. No spam, just sprouts!