
🌸 Spring Gardening Guide
March–May · Spring is the most exciting season in the garden — a fresh start full of possibility. Here's your complete, month-by-month playbook for a thriving spring garden.

🌱 Sprouty's Spring Reminder
All gardening is local! These tips are general guidelines — always check your specific USDA hardiness zone and local frost dates for the most accurate planting schedules.
Start Seeds Indoors
⏱ Early Spring — 6–10 weeks before last frost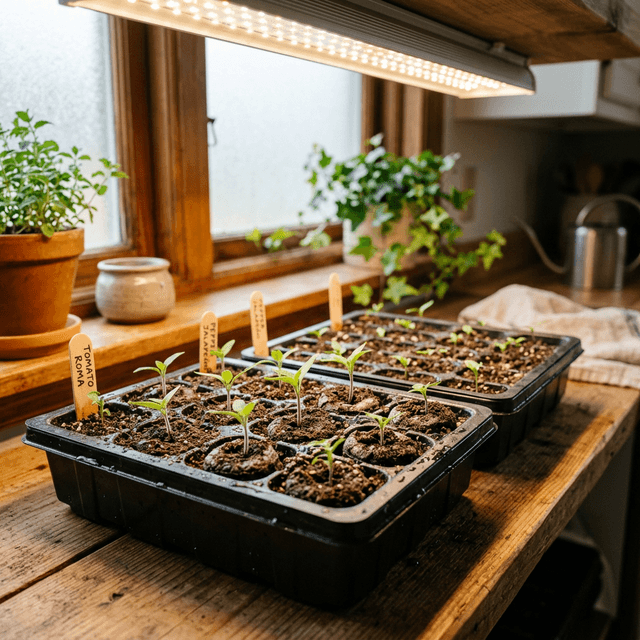
Getting a head start indoors is one of the highest-return activities in spring gardening. Tomatoes, peppers, and eggplant need a long season — starting them inside gives you a 6–8 week advantage over direct sowing.
Use 72-cell plug trays for beginners, or 4" pots for single plants. Bottom drainage is non-negotiable — waterlogged soil kills seedlings fast.
Never use garden soil. A proper seed-starting mix is fine-textured, pathogen-free, and holds moisture without compacting. Look for blends with perlite for drainage.
Tiny seeds (basil, lettuce) need light — press onto the surface. Tomatoes and peppers go ¼" deep. Squash and cucumbers go ½–1" deep.
Germination is dramatically faster at 70–80°F soil temperature. Use a seedling heat mat under trays until sprouts appear, then remove it.
A sunny south-facing window rarely delivers enough. Aim for 14–16 hours of light daily with a full-spectrum LED grow light kept 2–4" above seedlings.
One week before transplant time, place seedlings outdoors in a sheltered spot for 1 hour the first day. Increase by 1 hour daily until they're outside all day.
| Timing | What to Start |
|---|---|
| 10 wks before LFD | Peppers, Eggplant |
| 8 wks before LFD | Tomatoes, Parsley |
| 6 wks before LFD | Basil, Celery, Leeks |
| 4 wks before LFD | Cucumbers, Squash, Melons |
| 2 wks before LFD | Beans, Corn (optional) |
📍 LFD = Last Frost Date. Find yours at the USDA Plant Hardiness Zone map.
Direct Sow Cool-Season Crops
⏱ Very Early Spring — 4–6 weeks before last frost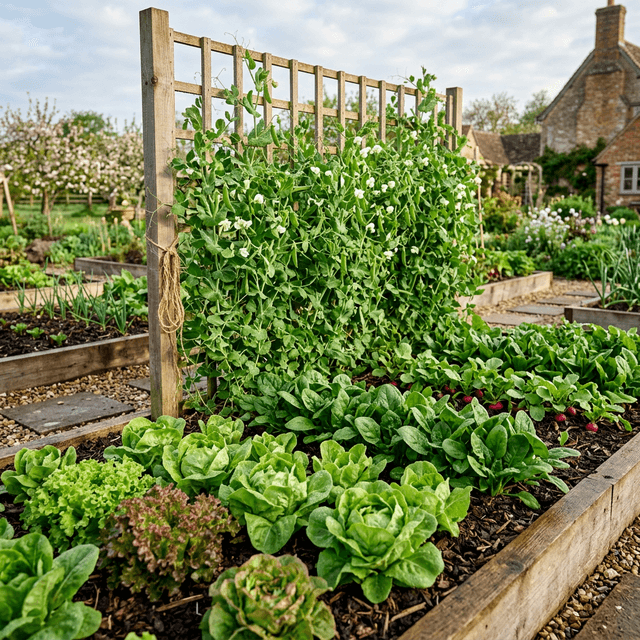
Cool-season crops are the unsung heroes of early spring. They can be planted weeks before your last frost date and actually taste better when grown in cooler temperatures. Most will bolt (go to seed) in summer heat, so get them in as early as the soil can be worked.
Grab a handful of soil and squeeze. If it crumbles when you open your hand, it's ready. If it stays as a ball or smears, wait a week and test again.
Install a 5-foot wire trellis or netting before sowing peas. It's much easier before they sprout. Sugar snap and snow peas climb to 3–5 feet — give them structure.
Rather than planting all your lettuce at once, sow a short row every 2 weeks. This gives you a continuous harvest rather than a giant glut all at once.
Most gardeners under-thin seedlings. Lettuce needs 6–12", carrots need 2–3", and radishes need 2". Overcrowding causes stunting and disease — thin to the proper spacing.
Keep a roll of floating row cover on hand. It buys 4–6°F of frost protection and can be laid directly on plants without hoops. Uncover on warm days above 40°F.
| Timing | What to Start |
|---|---|
| 6 wks before LFD | Peas, Spinach, Favas |
| 4 wks before LFD | Lettuce, Radishes, Swiss Chard |
| 3 wks before LFD | Carrots, Beets, Parsnips |
| 2 wks before LFD | Dill, Cilantro, Arugula |
| After LFD | Beans, Basil, Squash |
📍 Sow a second round of cool-season crops in late summer for a fall harvest.
Prepare Your Soil
⏱ Early Spring — as soon as soil is workable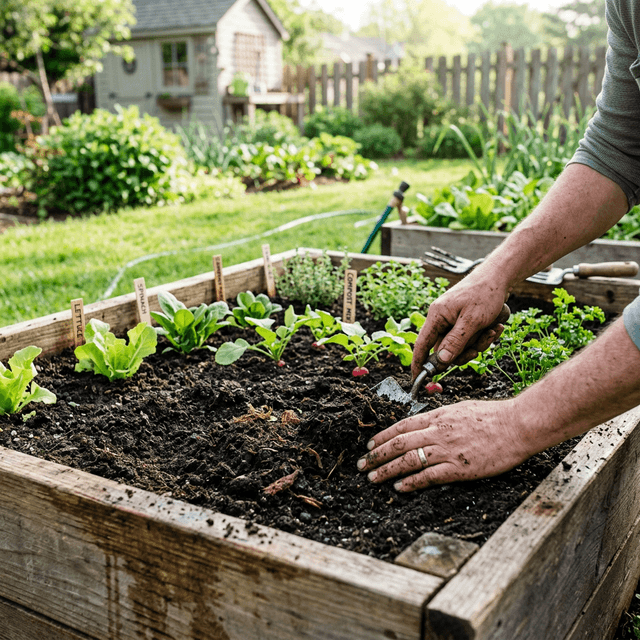
Your soil is the most important investment you can make in your garden. Great soil means bigger yields, fewer pests, and more drought tolerance. Don't rush this step — it pays compounding dividends all season.
A simple $15 soil test reveals your pH, nitrogen, phosphorus, and potassium levels. Most vegetables prefer a pH of 6.0–7.0. Acidic? Add lime. Alkaline? Add sulfur or composted pine needles.
Compost is the single most powerful soil amendment. It improves drainage in clay soils, water retention in sandy soils, and feeds the soil food web. Spread 2–4" over beds and dig in 6–8" deep.
Tilling wet clay soil destroys its structure and creates hardpan. Wait until soil passes the squeeze test (see Cool-Season Crops section above).
Work in a balanced granular fertilizer (5-5-5 or 10-10-10) or organic alternatives like kelp meal + blood meal + bone meal. This feeds plants for 3–4 months.
Spring is when perennial weeds like bindweed, thistle, and dandelion are most vulnerable. Remove them root and all before they set seed — one thistle plant can produce 5,000 seeds.
| Amendment | Benefit | Rate |
|---|---|---|
| Compost | Improves structure, feeds microbes, adds slow-release nutrients | 2–4" worked in |
| Lime (pelletized) | Raises pH in acidic soil | 5 lbs per 100 sq ft |
| Sulfur | Lowers pH in alkaline soil | 1–2 lbs per 100 sq ft |
| Balanced fertilizer (5-5-5) | All-purpose nutrient boost | Per label directions |
| Blood meal | Quick nitrogen boost for leafy plants | 3 lbs per 100 sq ft |
| Bone meal | Phosphorus for root & flower development | 3 lbs per 100 sq ft |
Prune, Clean Up & Divide
⏱ Early–Mid Spring — before new growth emerges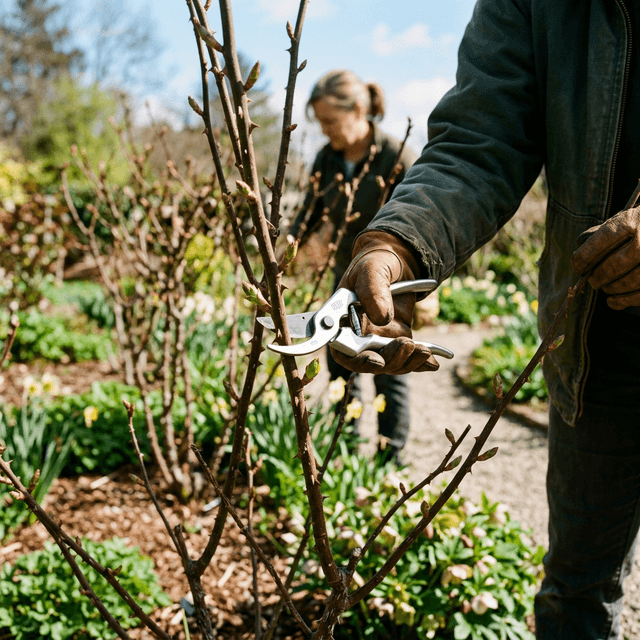
Spring cleanup is more than aesthetics — it removes overwintering pests and diseases, improves airflow, and redirects a plant's energy into strong new growth. The right cuts at the right time make a massive difference.
Cut out dead, damaged, or crossing canes first. Then prune to an outward-facing bud at a 45° angle, 1/4" above the bud. Aim for an open vase shape with 5–8 healthy canes.
Scratch-test canes before cutting — green under the bark means alive. Wait until growth breaks to see exactly where shrubs are dead. Some look dead long after they're actively sending sap.
Hostas, daylilies, ornamental grasses, and coneflowers benefit from division every 3–4 years. Dig up the clump, slice into sections with each having roots + shoots, replant immediately.
Before new growth emerges (usually late March–April), cut ornamental grasses to 3–4" from the ground. Use shears or a battery hedge trimmer for large clumps.
Don't strip mulch all at once — tender plants can be damaged by a hard frost. Pull it back gradually over 2 weeks as temperatures stabilize above freezing nightly.
| Plant | When to Prune | How |
|---|---|---|
| Roses | When forsythia blooms | Remove dead + cross canes, open vase shape |
| Hydrangeas (bigleaf) | Late spring, after bloom buds appear | Only remove dead wood — they bloom on old wood |
| Hydrangeas (panicle/smooth) | Late winter–early spring | Cut to 18–24" from ground |
| Fruit trees | Dormant, before bud break | Remove suckers, water sprouts, crossing branches |
| Ornamental grasses | Before new growth | Cut to 3–4" from ground |
| Lavender | After last hard frost | Cut to green wood only — never into old grey wood |
Plant Spring Perennials & Bulbs
⏱ Mid Spring — after danger of hard frostSpring-planted perennials and summer bulbs establish quickly in cool soil with ample moisture. From dahlias to lavender, getting them in the ground now gives them the best possible start.
Full sun perennials (lavender, echinacea, salvia) need 6+ hours direct sun. Part shade picks (hostas, astilbe, ferns) prefer dappled light. Mismatched plants are a constant struggle.
Dahlias, gladiolus, canna lilies, and elephant ears are frost-sensitive. Plant them after your last frost date — usually May for most of the US. Plant dahlias 4–6" deep, eyes up.
Perennials look sparse when first planted — resist the urge to crowd them. They'll fill in dramatically by year 2–3. Crowded plants compete for nutrients and invite disease.
Even drought-tolerant perennials need consistent watering their first season. Apply 1" per week until established (usually 6–8 weeks), then taper off.
Apply 2–3" of shredded bark or wood chip mulch around new plants, keeping it away from stems. This retains moisture and suppresses weeds during the critical establishment phase.
Start or Refresh Your Compost
⏱ Early Spring — as soon as temperatures are above freezingCompost is black gold for your garden — and spring is the perfect time to get a pile cooking. If you already have a bin, now's the time to turn it and get it active again after winter.
"Browns" (dead leaves, cardboard, straw) provide carbon. "Greens" (kitchen scraps, fresh grass, coffee grounds) provide nitrogen. Aim for roughly 3 parts browns to 1 part greens by volume.
A pile needs to be at least 3×3×3 feet (1 cubic yard) to generate heat. Smaller piles decompose slowly in the cold. Larger is fine — just build up in layers.
Smaller particles decompose faster. Run a lawnmower over leaves before adding them. Chop kitchen scraps, break up cardboard. This dramatically speeds up decomposition.
Compost should feel like a wrung-out sponge — moist throughout but not dripping. In dry spring weather, water your pile occasionally. Cover with a tarp to retain moisture during heavy rain.
Turning introduces oxygen, which is the primary driver of hot composting. Turn every 3–7 days for fast compost (ready in 4–8 weeks) or every few months for slow cold composting (ready in 6–12 months).
Want this month's tasks for your ZIP? Open the Garden Calendar, or browse all four seasonal guides.

Join Sprouty's Garden Club 🌱
Get weekly gardening tips, seasonal planting reminders, and exclusive guides delivered straight to your inbox. No spam, just sprouts!