
☀️ Summer Gardening Guide
June–August · Summer is the garden's peak season — harvests are abundant, growth is explosive, and the pace is relentless. Master heat, water, and pests with these deep-dive strategies.

🌱 Sprouty's Summer Reminder
All gardening is local! These tips are general guidelines — always check your specific USDA hardiness zone and local frost dates for the most accurate planting schedules.
Water Deeply & Wisely
⏱ All Summer — especially critical during heat waves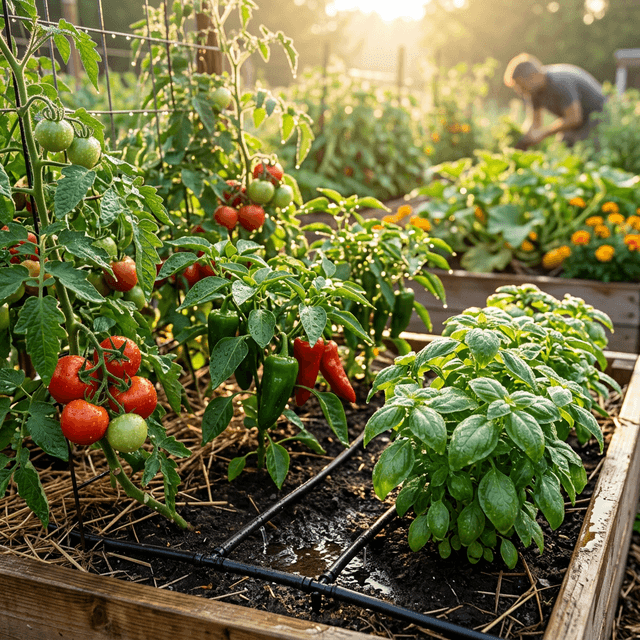
Water is the number one limiting factor in a summer garden. Too little and plants wilt; too much and roots suffocate and diseases spread. The goal is deep, infrequent watering that encourages roots to grow down — not shallow, frequent irrigation that keeps roots near the surface.
Watering at sunrise minimises evaporation and gives foliage time to dry before evening. Evening watering leaves wet leaves overnight, creating perfect conditions for fungal diseases like powdery mildew and blight.
Push your finger 2 inches into the soil beside the plant. If it's dry at that depth, water. If still moist, wait. Most summer vegetables need watering every 2–3 days in hot weather, but soil type varies dramatically.
Apply water slowly until it penetrates 6–8 inches deep. A quick splash on the surface evaporates before reaching roots. Deep watering trains roots downward, making plants more drought-tolerant.
Drip irrigation delivers water directly to root zones with 90% efficiency vs 50–70% for sprinklers. Lay soaker hoses along plant rows and cover with mulch. Timer-controlled systems save significant time and water.
Wilting at midday on a hot day is normal — plants conserve water by closing stomata. But wilting that persists into early morning means the plant is truly water-stressed. Yellowing lower leaves can indicate overwatering; brown leaf edges often mean underwatering.
Pots and containers can dry out in 24 hours in summer heat. Check them daily. Self-watering planters with reservoirs are a game-changer for summer container gardens.
| Timing | What to Start |
|---|---|
| Daily check | Containers, seedlings, newly transplanted plants |
| Every 1–2 days | Sandy soils, raised beds, hot/windy conditions |
| Every 2–3 days | Established vegetables in loamy soil |
| Every 3–5 days | Established perennials, mulched beds |
| Weekly (deep) | Trees and shrubs established 2+ years |
📍 During heat waves (90°F+), increase frequency by 50%. Mulch always reduces watering needs.
Mulch Everything
⏱ Early Summer — apply before heat arrives, refresh mid-season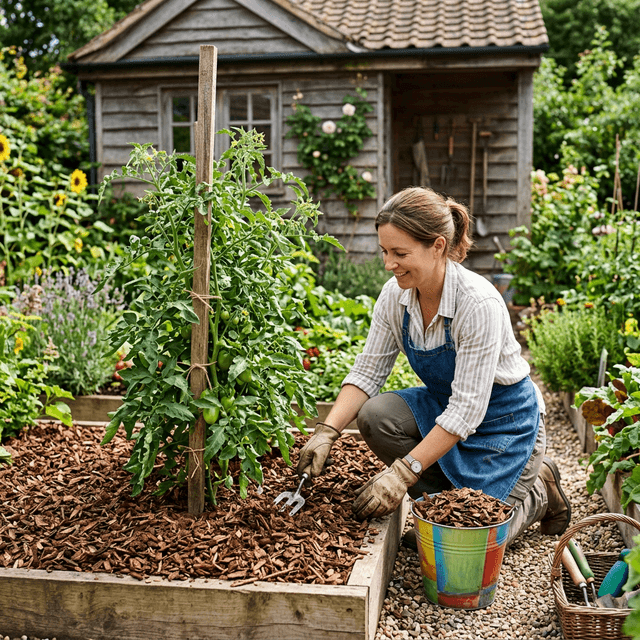
A 3-inch layer of mulch is one of the most impactful things you can do in summer. It reduces soil temperature by up to 10°F, cuts watering frequency in half, suppresses 90% of weeds, and feeds the soil as it breaks down. It's essentially free insurance for your garden.
Thicker than 4 inches can prevent water penetration and deplete soil oxygen. Thinner than 1.5 inches provides little benefit. Aim for a consistent 2–3 inch layer.
Mulch piled against plant stems traps moisture and creates a perfect environment for crown rot and rodent damage. Leave a 2–3 inch gap around each stem.
Wood chips are best for paths and around trees/shrubs. Straw is ideal for vegetable gardens — it's easy to work with and breaks down by fall. Shredded leaves are free and excellent for perennial beds.
Mulch breaks down over the season. Check depth monthly and top up to 2–3 inches as needed. Decomposed mulch at the bottom is already feeding your soil — just add a fresh layer on top.
Wood chip paths between beds keep weeds down, prevent compaction, and slowly build soil at the path edges. They also keep your boots clean after rain.
| Amendment | Benefit | Rate |
|---|---|---|
| Wood chips | Long-lasting, great for trees/shrubs/paths, feeds soil fungi | 2–3 inches |
| Straw (not hay) | Ideal for vegetables, easy to plant through, breaks down by fall | 3–4 inches |
| Shredded leaves | Free, excellent for perennial beds, worms love it | 2–3 inches |
| Compost | Feeds soil while mulching, best for annual beds | 1–2 inches |
| Pine straw | Good for acid-loving plants like blueberries | 2–3 inches |
| Grass clippings | Free and nitrogen-rich — apply thin layers only to prevent matting | 1 inch, dried |
Harvest at Peak & Keep Plants Producing
⏱ Mid–Late Summer — harvest often to maximize yields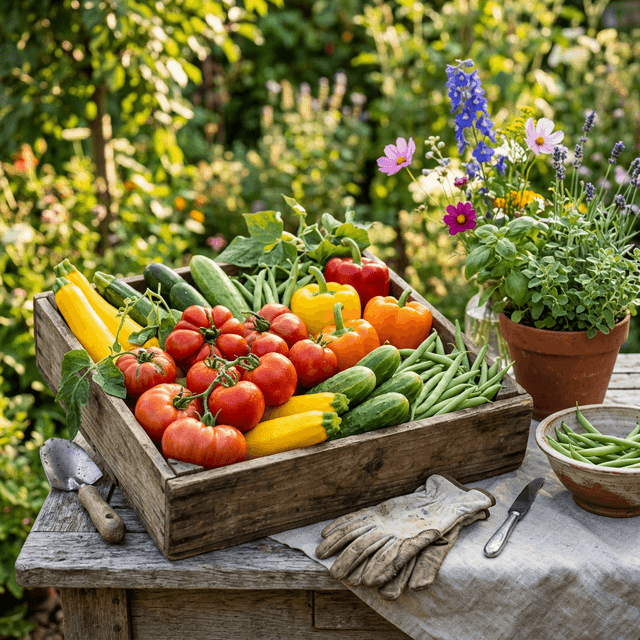
The biggest mistake summer gardeners make is letting vegetables overripen. When a plant's fruits mature fully and begin to seed, it receives the signal to stop producing. Frequent harvesting — even picking slightly underripe — keeps plants in vigorous production mode all season long.
At 6–8 inches, zucchini is tender and sweet. Let it hit baseball-bat size and the plant focuses energy on that one fruit and stops setting new ones. Pick relentlessly.
Tomatoes are ripe when they give slightly to pressure (like a ripe peach) and release from the vine with a gentle tug. Fully red for most varieties, but check the variety tag — many heirlooms ripen to yellow, orange, or purple.
String/green beans should snap cleanly and show no bumpy seed bulges inside. Snap peas are ready when the pod is full and bright green. Check every 3 days — they go from perfect to overripe in 48 hours.
Pulling cucumbers can damage the vine. Use clean garden scissors or a knife. Harvest at 6–8 inches for slicers, 3–4 inches for pickling. Yellow cucumbers are overripe and bitter.
Pinch back basil flowers the moment they appear — once basil bolts, leaves turn bitter within days. Harvest up to one-third of any herb plant at once, then let it regrow.
| Timing | What to Start |
|---|---|
| Every 1–2 days | Zucchini, summer squash, green beans |
| Every 2–3 days | Cucumbers, snap peas, basil, lettuce |
| Every 3–5 days | Tomatoes, peppers, eggplant |
| Weekly | Herbs for drying, large fruiting crops |
| As ready | Corn (check daily once silk turns brown) |
📍 Harvest in the morning when vegetables have highest water content and best flavour.
Manage Pests Organically
⏱ All Summer — preventive scouting from June through August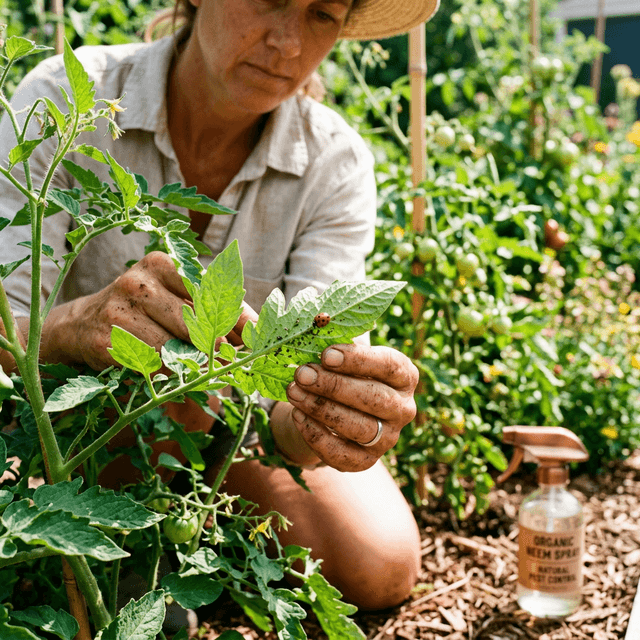
Summer heat accelerates pest reproduction dramatically — a single aphid can produce 80 offspring per week in warm conditions. The key is early detection through daily scouting, plus understanding which pests you're dealing with before reaching for any spray.
Walk your garden daily and flip leaves. Check tomato stems for hornworm frass (black droppings). Look under squash leaves for squash bug eggs. Early detection is 10x more effective than treatment after an infestation.
Not every bug is a pest. Ground beetles, spiders, lacewings, and parasitic wasps are allies. Misidentification leads to killing beneficials. Use a free app like iNaturalist or the Plantix app to ID insects accurately.
Tomato hornworms and squash bugs can be picked by hand and dropped in soapy water. It's more effective than any spray for large, mobile insects. Wear gloves if squeamish — this works.
Neem oil disrupts insect hormone systems and works on soft-bodied pests (aphids, whiteflies, mites, thrips). Mix 1 tablespoon per gallon with a few drops of dish soap. Spray in the evening — neem degrades in UV light and can burn leaves in midday sun.
A 2% soap solution (pure castile soap like Dr. Bronner's, not dish detergent) kills aphids, mites, and mealybugs on contact. It has zero residual — you must hit the insects directly. Reapply after rain.
Plant dill, fennel, cilantro (let it flower), and yarrow near vegetables. These attract parasitic wasps, lacewings, and hoverflies that eat aphids and caterpillar eggs. A diverse garden naturally self-regulates pest pressure.
| Plant | When to Prune | How |
|---|---|---|
| Aphids | Clusters on new growth, sticky residue | Blast with water, neem oil spray, introduce ladybugs |
| Tomato Hornworm | Defoliated stems, black frass on leaves | Hand-pick; parasitic wasps will take over naturally |
| Squash Vine Borer | Wilting squash stems with sawdust-like frass | Slit stem, remove larva, mound soil over wound |
| Spider Mites | Stippled leaves, fine webbing in hot dry weather | Increase humidity, spray neem oil, predatory mites |
| Japanese Beetles | Skeletonized leaves on roses/beans/corn | Hand-pick into soapy water; milky spore for long-term grub control |
| Cucumber Beetles | Yellow/black beetles on cucurbit flowers/leaves | Row covers until flowering; kaolin clay spray |
Start Planning & Planting for Fall
⏱ Mid Summer — July through early AugustThe best fall garden is planted in the heat of summer. Broccoli, kale, cauliflower, and lettuce that you start in July will be ready for harvest just as summer crops wind down. This is the secret to a year-round productive garden.
Look up your average first fall frost date. Count back the "days to maturity" listed on your seed packet, then add 14 days (for short days slowing growth in fall). That's your last date to direct sow or transplant.
Broccoli, cauliflower, cabbage, and Brussels sprouts germinate better indoors away from summer heat and summer pests. Sow in 4" pots, keep in a cool location (65–70°F is ideal), and transplant in 4–6 weeks.
Lettuce, spinach, arugula, radishes, and turnips can be direct-sown in garden beds in late July/August. Shade with 30% shade cloth during germination to keep soil cool enough to sprout.
As summer crops finish, rip them out immediately and replant or cover with compost. Don't let beds sit bare — bare soil invites weeds and loses moisture and structure rapidly.
From now through September, sow a small row of lettuce every two weeks. This gives you a continuous harvest stream from September through first frost instead of a feast-or-famine glut.
| Timing | What to Start |
|---|---|
| Early July | Broccoli, Brussels Sprouts (start indoors) |
| Mid July | Cauliflower, Cabbage, Kale (start indoors) |
| Late July | Lettuce, Spinach, Arugula (direct sow) |
| Early August | Radishes, Turnips, Bok Choy (direct sow) |
| Mid August | Last call for fast-maturing greens |
📍 Zones 5–6: start earliest. Zones 7–9: start 2–3 weeks later. Zones 10+: start in September.
Feed Heavy Feeders & Deadhead Flowers
⏱ Mid Summer — 6–8 weeks after planting through harvestPeak summer production demands consistent nutrition. Vegetables like tomatoes, corn, and squash are heavy feeders that rapidly deplete soil nutrients. Flowers stop blooming if spent heads aren't removed. A well-timed feeding and deadheading routine keeps everything performing at its peak.
Early in the season, tomatoes need balanced NPK (nitrogen, phosphorus, potassium). Once you see the first fruits sizing up, switch to a low-nitrogen, high-potassium formula (like 5-10-10 or tomato-specific formula). Too much nitrogen causes lush foliage at the expense of fruit.
When corn reaches knee height (about 12 inches), sprinkle a nitrogen-rich fertilizer like blood meal or ammonium sulfate alongside each row and water in. Corn is one of the heaviest nitrogen feeders in the vegetable garden.
If leaves show yellowing between veins (iron or magnesium deficiency), a foliar spray of liquid seaweed or diluted compost tea delivers nutrients faster than soil applications. Spray in the morning and avoid midday sun.
Zinnias, petunias, marigolds, and dahlias stop producing flowers once seeds begin to form. Remove spent blooms the moment petals drop — cut back to a leaf node or side bud. This keeps plants flowering through first frost.
Suckers are shoots that grow in the crotch between the stem and a leaf branch. On indeterminate tomatoes (most heirlooms), removing suckers below the first flower cluster focuses energy into fruit rather than foliage.
| Amendment | Benefit | Rate |
|---|---|---|
| Balanced granular (10-10-10) | All-purpose summer feeding for vegetables | Per label, every 4–6 weeks |
| Tomato fertilizer (5-10-10) | Low N, high K for fruiting tomatoes/peppers | Every 2–3 weeks once fruiting |
| Blood meal | Fast nitrogen for heavy feeders (corn, leafy greens) | 3 lbs per 100 sq ft |
| Fish emulsion | Balanced liquid feeding, gentle and fast-acting | 2 tbsp per gallon, weekly drench |
| Liquid seaweed | Micronutrients and trace minerals, great foliar feed | 1 tbsp per gallon foliar spray |
| Compost tea | Feeds both plant and soil biology simultaneously | Drench soil every 2–3 weeks |
Want this month's tasks for your ZIP? Open the Garden Calendar, or browse all four seasonal guides.

Join Sprouty's Garden Club 🌱
Get weekly gardening tips, seasonal planting reminders, and exclusive guides delivered straight to your inbox. No spam, just sprouts!