You sprayed your plant. You felt good about it. A week later, you checked under a leaf and — there they are again. Tiny, fast-moving, infuriating.
Thrips don't survive a spray and disappear. They survive a spray and wait. Understanding why is the whole game.
Why One Treatment Never Works: The Life-Cycle Trap
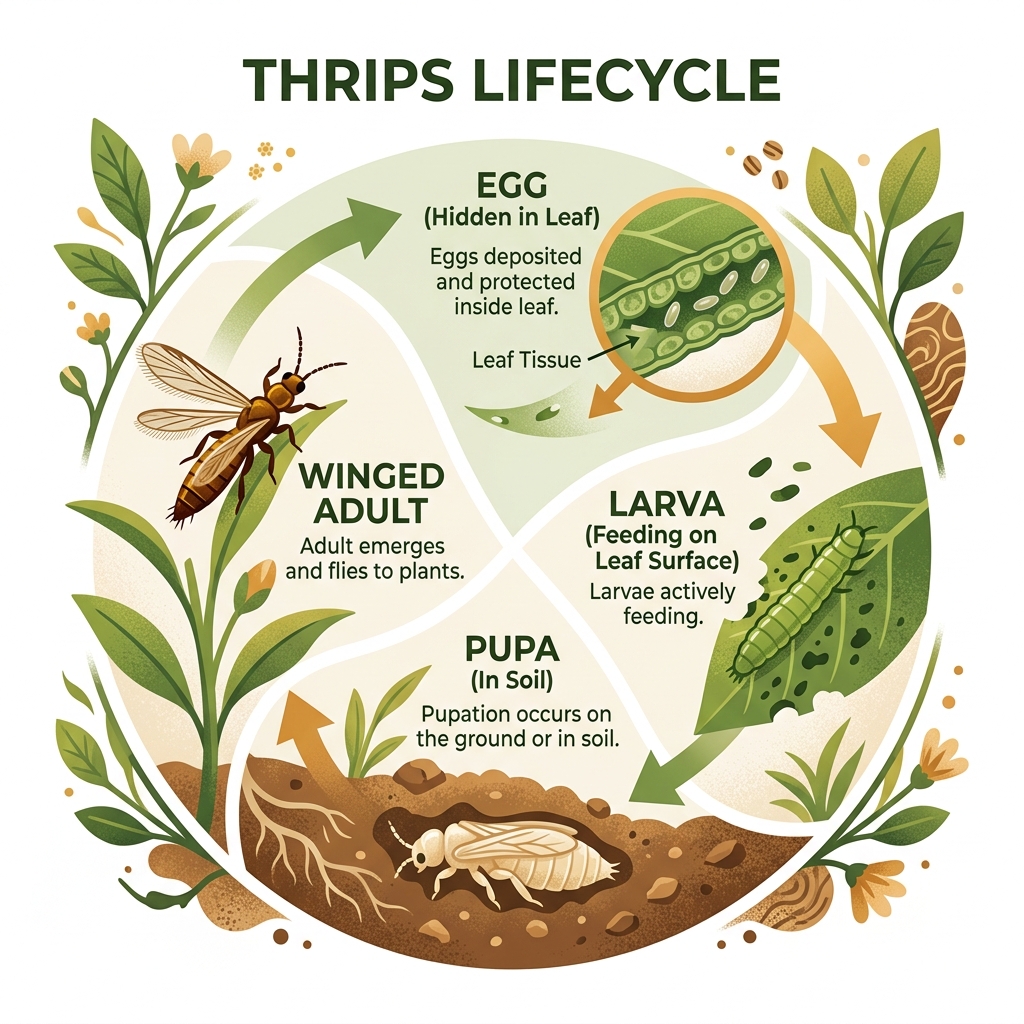
Thrips have a four-stage life cycle — and here's the critical detail most guides skip over: only two of those stages are even on your plant.
Here's the breakdown in plain English:
- 🥚 Egg stage (7–10 days) — Adult females slice into leaf tissue and deposit eggs inside the leaf. No spray can reach them here. They're physically sealed inside the plant.
- 🐛 Larva stage (7–14 days) — The hatched larvae crawl onto the leaf surface and start feeding. This is the only stage your spray effectively kills.
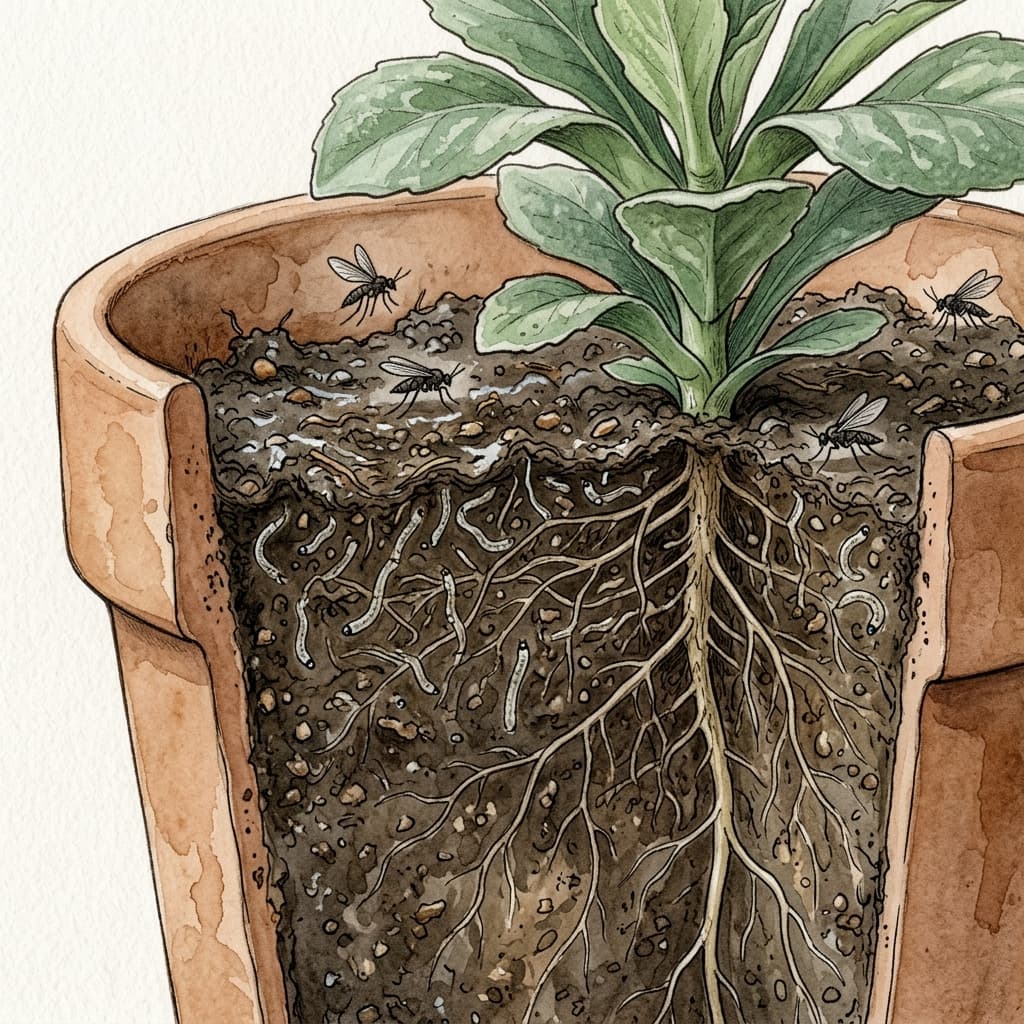
- 🫙 Pupa stage (7–14 days) — Mature larvae drop off the plant and pupate in the top layer of soil (or in the growing media). Again — out of reach.
- 🪰 Winged adult (ongoing) — They emerge from the soil, fly back onto the plant, and start laying eggs again. The whole cycle repeats every 3–4 weeks in warm indoor conditions.
🪲 The math that explains everything
When you spray once, you kill the larvae currently feeding. But ten days later, a fresh batch of eggs hatches. Two weeks after that, the pupae in your soil emerge. You didn't fail — you just only addressed one-quarter of the problem. That's why the cadence matters more than the product.
Spot It Early: What Thrips Damage Actually Looks Like
Thrips are tiny — most are under 2mm — and fast-moving. By the time you see one clearly, you've probably had an infestation for weeks. The damage is what gives them away first:
| Sign | What You're Seeing | Severity |
|---|---|---|
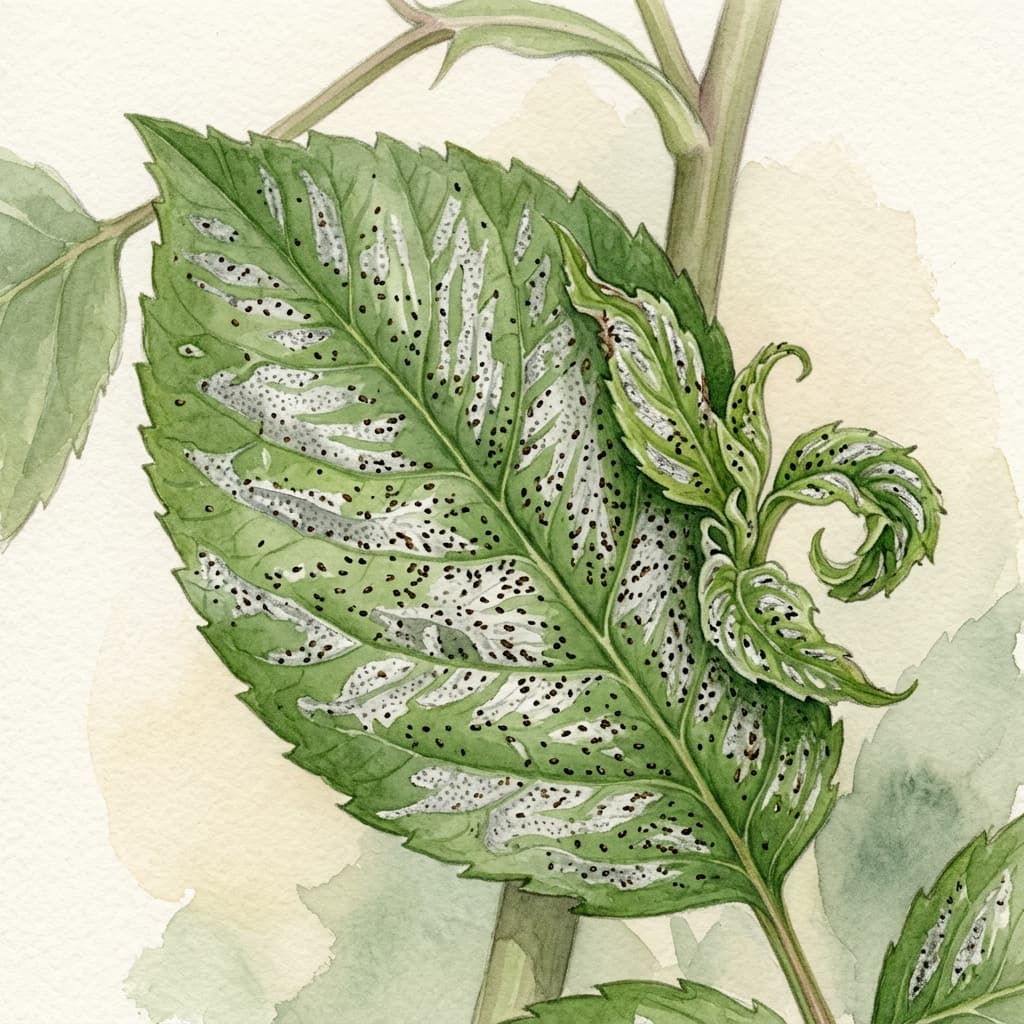
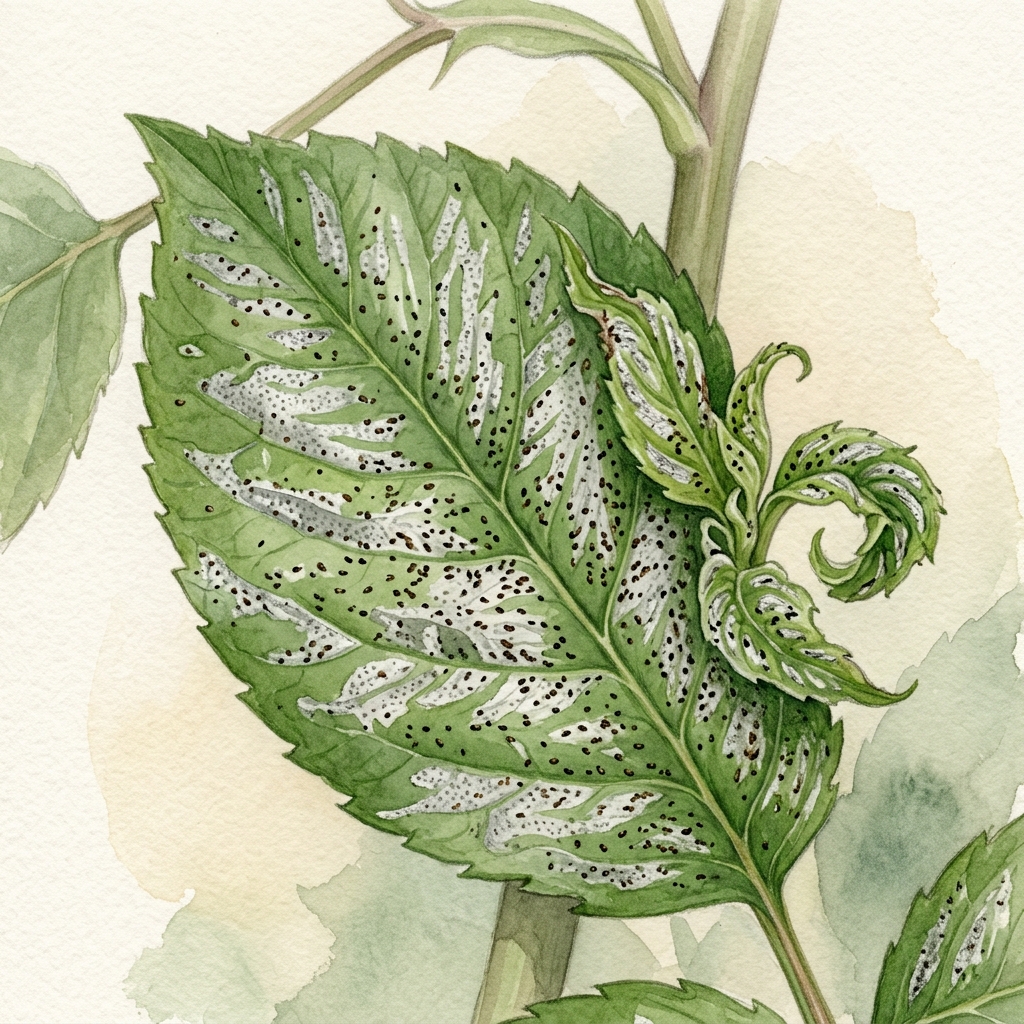
| Silvery or bronze streaks | Empty plant cells where thrips scraped out the contents | 🟡 Early to moderate |
| Tiny black specks | Thrips frass (droppings) — often misread as dirt or fungus | 🟡 Early — treat now |
| Distorted new growth | New leaves that emerge curled, puckered, or stunted — thrips attacked them before they unfurled | 🟠 Moderate — active infestation |
| White papery patches | Large areas of drained cells — visible on both top and underside of leaves | 🔴 Heavy — urgent action |
| Tiny moving specks under leaves | Actual larvae or adults — use your phone flashlight and look at the leaf undersides and inside rolled new growth | 🔴 Confirmed active infestation |
Why early signs get missed: Silvery streaks are subtle, and small specks look like soil splash or water residue. Most people notice thrips when distorted growth appears — which means the infestation is already a few weeks old. That's fine. It just means your treatment window needs to be longer.
A Realistic Treatment Cadence
Thrips control is a four-to-six-week commitment. There's no shortcut — but the individual sessions are quick. Here's the rhythm that actually works:
📅 The Thrips Treatment Timeline
- Day 1: Isolate the plant. Wipe down visible damage with a damp cloth. Spray the entire plant — tops of leaves, undersides, inside folded growth, stems, and the top inch of soil. Use neem oil or insecticidal soap (see mix below).
- Day 4–5: Inspect. If you see activity, do a light second spray. This catches larvae that hatched since Day 1.
- Day 7: Full spray again. This is your most important repeat — it targets the new hatch cycle.
- Days 14 and 21: Two more full sprays at weekly intervals. By week 3, you've broken the egg-hatch-pupa-adult cycle at every stage.
- Day 28–42: Reduce to fortnightly checks. If zero new damage appears over two consecutive inspection windows, you're done.
What to Spray
You don't need expensive products. These three options all work — rotate them to prevent resistance building up:
| Spray | Mix Ratio | Best Used |
|---|---|---|
| Neem oil | 2 tsp neem + 1 tsp dish soap + 1L warm water | Weeks 1–2 (heavy hitter) |
| Insecticidal soap | 1 tbsp Castile soap + 1L water | Alternate weeks (gentler on foliage) |
| Isopropyl alcohol wipe | 70% isopropyl + few drops of water on a cotton pad | Spot treatment on visible insects / heavily damaged areas |
Spray in the evening — direct sunlight on wet neem oil can scorch leaves. Always cover the soil surface too, since that's where the pupae are. And always treat the plants nearby, even if they look clean — adults fly, and what looks clean may not be.
For a full overview of homemade pest control sprays and when to use each, Sprouty's Natural Pest Control reference guide has the complete breakdown.
Don't Just Treat the Visible Damage — Treat the Whole Environment
Thrips hide in places most people never spray:
- 🌀 Inside rolled or folded new growth — the most common place larvae are missed. Gently uncurl new growth and spray directly inside.
- 🌱 The top inch of soil — drench it with your neem oil mix every spray session to kill pupating thrips before they emerge.
- 🪴 The pot exterior and saucer — thrips pupae travel, and they'll use any surface near the plant.
- 🌿 Neighboring plants — even ones that look clean. Adults are winged. Spray them all.
If your thrips-hit plant has been sitting next to your Monstera or near a begonia all summer, those plants need a full treatment round too. Thrips aren't loyal to one host. For plants with pest cross-contamination, check Sprouty's guide on treating and containing plant diseases before they spread — the quarantine logic applies directly here.
Save vs. Sacrifice: The Framework for Severely Infested Plants
Sometimes a plant is so far gone that treating it is a bigger risk than losing it — because it becomes a permanent reservoir that re-infests everything else. Here's how to decide:
| Situation | Verdict | Action |
|---|---|---|
| 40–60% of leaves show silvery damage, but new growth still looks okay | ✅ Save | Strip the worst leaves, start the treatment cadence, isolate for 4 weeks |
| New growth is distorted on every single shoot, plant looks stunted overall | ⚠️ Aggressive treatment or hard prune | Cut back heavily to a clean node, treat the remaining plant, change the soil |
| 80%+ leaf damage, plant is declining fast, multiple treatment rounds have failed | 🔴 Sacrifice | Bin the plant AND the soil. Sterilize the pot before reuse. Protect the rest. |
| Inexpensive common plant, propagation is easy (pothos, tradescantia, etc.) | 🔄 Consider cutting losses early | Take clean cuttings from unaffected sections only, discard the rest, start fresh |
Letting go of a plant is hard. But keeping a heavily infested plant "out of optimism" while it reinfests your entire collection isn't kindness — it's a gamble that usually costs you more than one plant in the end.
When Are You Actually Safe? Knowing When to Stop
This is the question nobody answers clearly. Here's a concrete threshold:
✅ The "Safe" Checklist
You can stop active treatment when ALL of the following are true:
- No new silvery damage has appeared on any leaf in the last 14 days
- No black frass specks visible anywhere on the plant (including inside new growth)
- New growth is emerging normally — not distorted or puckered
- You've inspected leaf undersides and inside furled growth with a flashlight and found nothing
- It's been at least 4 weeks since your first treatment
If you hit all five, you've broken the cycle. You can return the plant to its regular spot — but keep it slightly separate from its neighbors for another two weeks, just as a buffer.
If you're at 4 out of 5, keep going for another week. Don't rush this — the cost of one more spray is nothing compared to the cost of starting over.
🌿 Sprouty's Thrips Summary
Thrips aren't hard to kill — they're hard to finish. The eggs are inside your leaves. The pupae are in your soil. One spray only reaches the part currently feeding. Treat every 5–7 days for 4 full weeks, hit the soil and hidden spots, isolate from neighbors, and know your save-versus-sacrifice line. Do all of that and they don't come back. Skip a week and you're starting from scratch.
Dealing with other mystery spots and damage? Sprouty's guide to why plant leaves turn yellow can help you rule out nutrient and watering causes before assuming it's pests — sometimes the timeline overlap causes confusion.