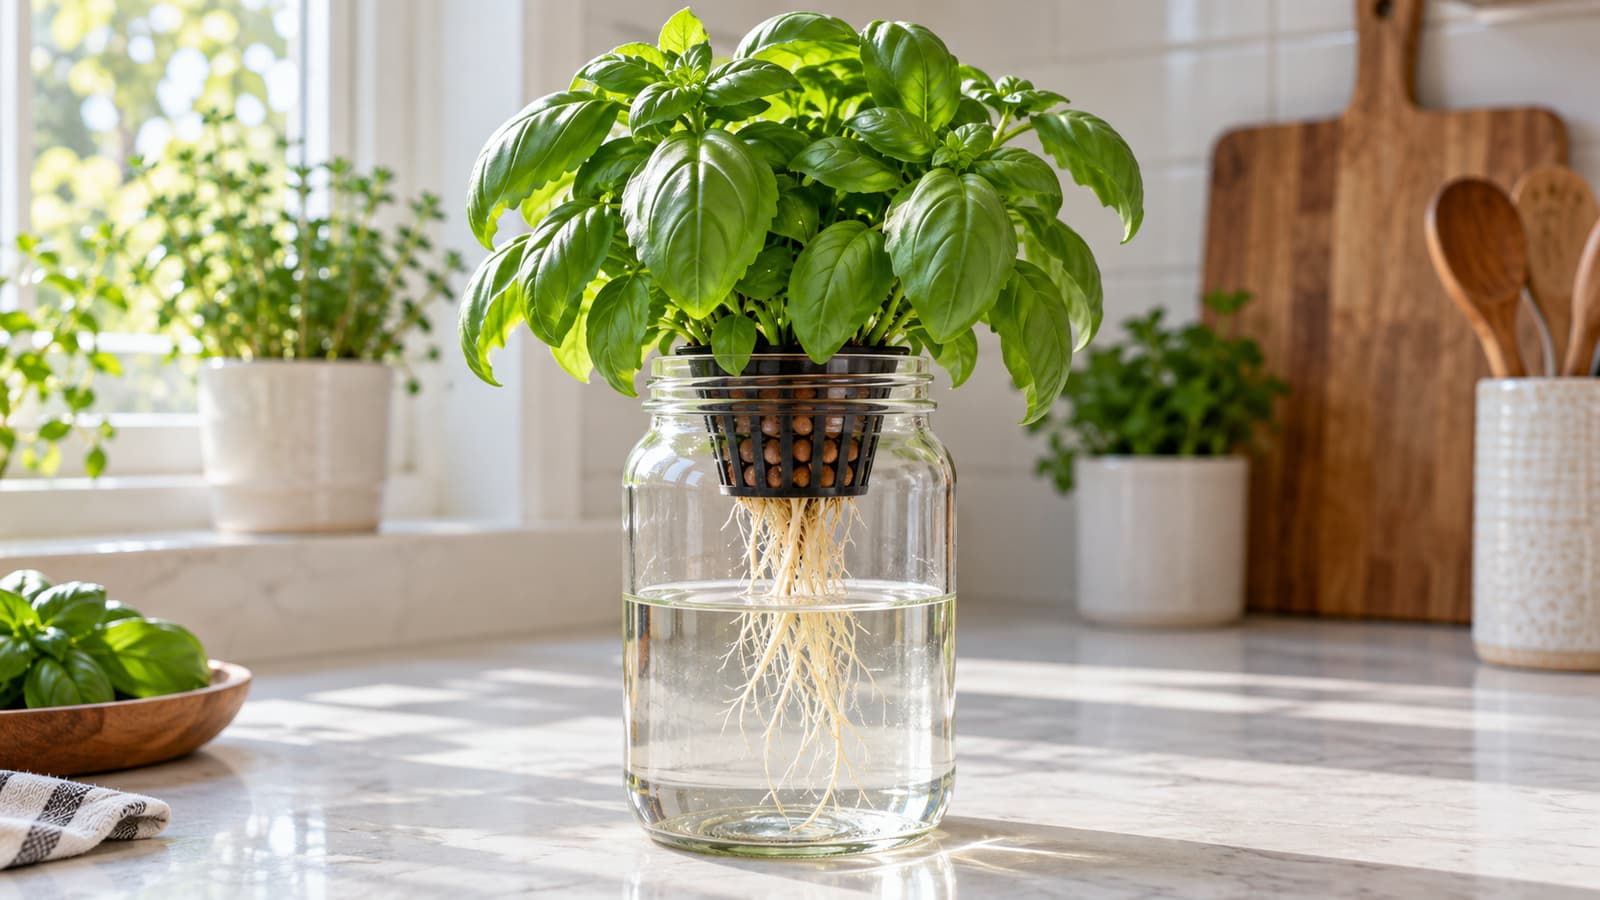

A mason jar can hold a simple hydroponic basil setup: the net pot supports the plant, the lower roots reach nutrient solution, and an air gap supplies oxygen to the upper roots. Start with one plant, keep the jar covered between root checks, and watch the water level as it grows.
That is the whole idea in one paragraph. The rest of this guide turns it into a working jar: what one jar can and cannot do, the exact materials, two ways to start your cutting, and the water-level habits that keep basil alive for weeks of harvests. Sprouty will point out the parts where beginners usually go wrong.
What One Jar Can (and Cannot) Do
One quart jar comfortably supports one basil plant through rooting and weeks of steady leaf harvests. The visible roots, the falling waterline, and the air gap make it one of the best beginner demonstrations in all of gardening.
It cannot support a crowd. Two or three cuttings in the same jar compete for the same small reservoir, drink it dry faster, and tangle their roots. And while the passive air-gap method is well documented — the University of Hawaiʻi's non-circulating hydroponics publication explains how upper roots colonize the humid air zone as the solution level drops — that research describes the mechanism, not a promise that a one-quart basil jar stays productive forever. Expect a great run of harvests, then start a fresh cutting when growth slows.
Materials: The Whole Kit
| Component | Size / fit | Required? | Purpose |
|---|---|---|---|
| Wide-mouth mason jar | 32 oz (1 quart) | Yes | Reservoir; stable base; lets you watch roots |
| Net pot | 3-inch (measure your jar mouth) | Yes | Holds the plant above the solution |
| Clay pebbles (LECA) | A handful | Yes | Anchors the stem, keeps air around it |
| Basil cutting | 4–6 in, non-flowering, 2+ leaf nodes | Yes | The plant itself |
| Liquid hydroponic nutrient | Formula for herbs / leafy greens | Yes | All plant food — no soil in this system |
| Water | Unsoftened tap, rainwater, or distilled | Yes | Reservoir base |
| Dark sleeve | Paper bag, kraft paper, fabric wrap | Strongly recommended | Blocks light between root checks; limits algae |
| pH test strips | General-range strips | Optional | Check 5.5–6.5 if basil struggles or tap water is alkaline |
| Small drinking glass | Any | Only for Path A | Root the cutting in plain water first |
💧 A note on water
Use unsoftened tap water — a bypass tap or outdoor hose bib if your home has a softener. Ordinary pitcher or faucet filters do not reliably remove dissolved sodium, so "filtered" softened water is not a safe substitute. Rainwater or distilled water also work well; just mix nutrients at the label rate since they carry no minerals of their own.
Root a Basil Cutting: Two Paths
Every build starts with a cutting. Snip a healthy, non-flowering basil stem just below a leaf node — the slightly swollen point where leaves meet the stem. Strip the lower leaves so none will sit in water, keeping two or three leaf sets at the top. Avoid flowering stems: once basil blooms, it puts energy into seeds instead of roots.
Prefer starting from seed instead? A cutting skips germination and gives you a head start, but a seed-started seedling can go straight into the net pot once it has a few true leaves — our starting seeds indoors guide walks through raising strong seedlings under lights.
Path A: Root in plain water first (recommended)
This is the simplest, most forgiving route. Stand the cutting in a small glass of room-temperature water with at least one bare node below the waterline and all leaves above it. Set the glass in bright, indirect light — gentle conditions, not a blazing windowsill — and change the water every two to three days. White root bumps usually appear at a node within about a week, followed by thin white roots. When roots reach roughly an inch long, move to the jar build below.
Path B: Start directly in the jar
One step fewer, one variable more. Rinse your clay pebbles until the water runs clear and soak them for at least an hour. Seat the net pot in the jar, fill with nutrient solution (mixed at the label's seedling or cutting rate — see below) until the water just touches the bottom of the net pot, and nestle the cutting into the damp pebbles so that at least one bare node sits right at the moist pebble line, just above the water surface. The node must stay moist from wicking — not submerged, not dry. If your first attempt wilts, switch to Path A; there is no prize for the harder route.
Build the Jar and Mix Nutrients
For Path A, lift your rooted cutting from its glass. Hold it upright in the center of the net pot with the new roots hanging below the pot's bottom, and gently add damp clay pebbles around the stem. Do not crush or tightly pack them — the stem needs support, not pressure.
Fill the jar with room-temperature water and add hydroponic nutrients at the manufacturer's seedling or cutting rate. If the label only gives a mature-plant rate, start at about one-quarter strength. More fertilizer does not grow roots faster; an overly concentrated solution can damage a young plant before it has the roots to use it. This is a label-directed system — the nutrient maker's rates beat any universal recipe.
Basil prefers mildly acidic hydroponic water, roughly pH 5.5–6.5. You do not need to turn a first jar into a chemistry project, but the University of Minnesota Extension's small-scale hydroponics guide notes pH as part of routine solution care — inexpensive test strips are worth it if your basil struggles or your tap water runs alkaline.
Water Levels: Startup vs. Established
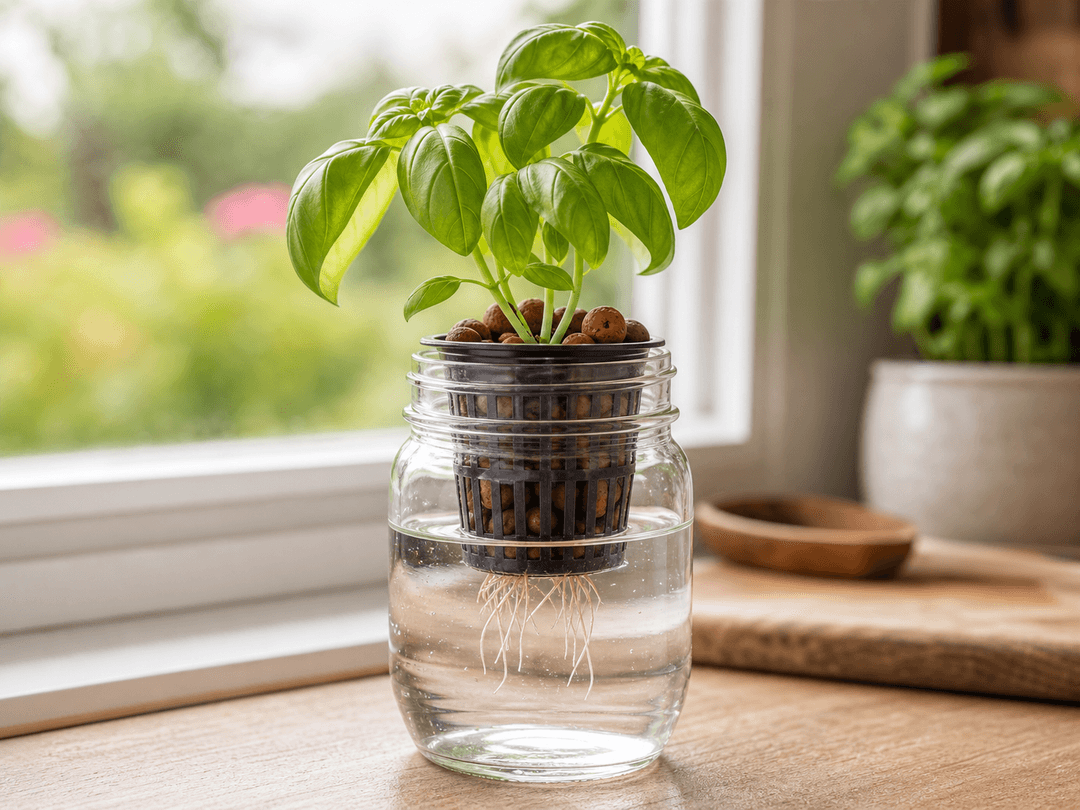
This is the part that decides whether the jar thrives. The waterline is not one fixed level — it has two stages, and mixing them up is the most common beginner mistake.
🌱 Sprouty's water-level rule
Let the level fall naturally as the plant drinks — do not top it back up to the net pot. When you change the solution, refill only to your marked refill line so the established air gap survives the change. Flooding the air-root zone undoes the whole design.
Light, Algae, and Reservoir Maintenance
Light: gentle for cuttings, strong for harvests
A fresh cutting roots best in gentle conditions: bright, indirect light or soft morning sun. A hot west-facing window can overheat the water and scorch a cutting that has no roots yet, so keep new jars back from intense afternoon glass.
Once the plant is established, basil is a sun-lover. NC State Extension lists basil as a full-sun plant — aim for at least six hours of strong light a day for genuinely productive growth, either a bright south window or a modest grow light. A dim corner keeps the plant alive but yields little worth harvesting.
Keep roots in the dark
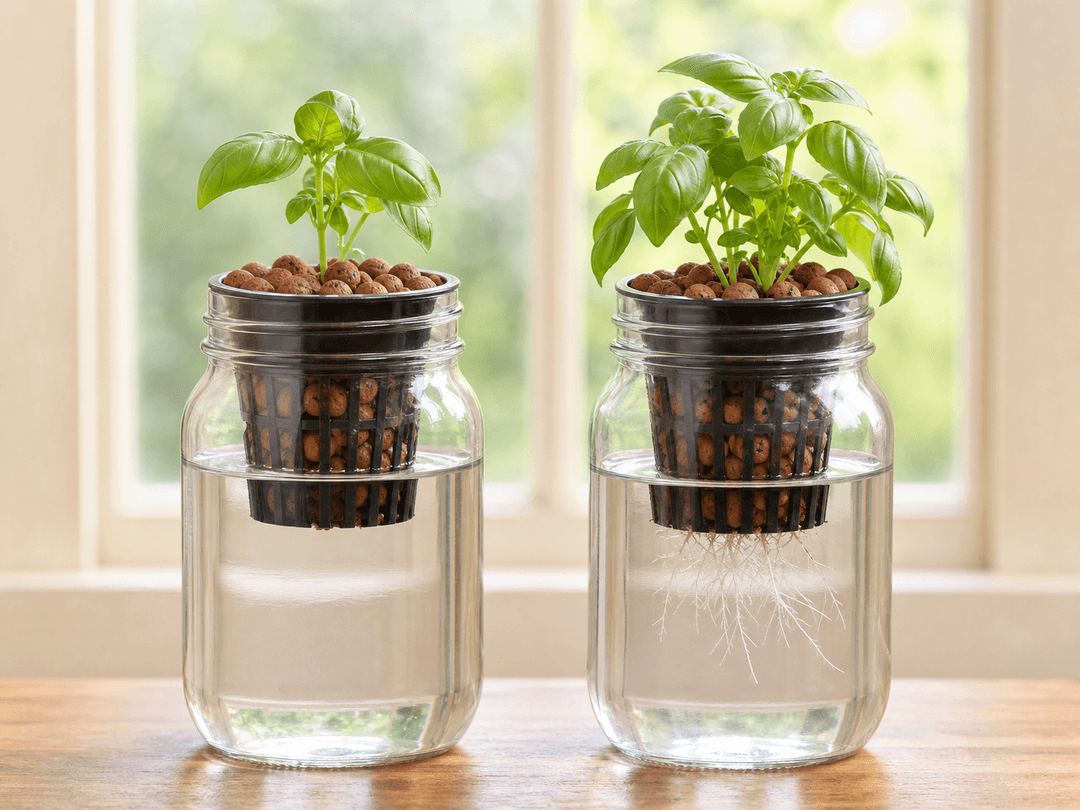
A clear jar makes root development fascinating to watch, but constant light also encourages algae. Algae competes for nutrients, coats the glass, and can make the water lose oxygen faster. Give the jar a removable sleeve — kraft paper, a clean paper bag, or a loose fabric cover. Lift it for a quick root check, then put it back. Do not paint the glass if watching the roots is the reason you chose a mason jar.
Maintenance rhythm
Check the water level every few days, especially in warm weather. Every one to two weeks, pour out the old solution, rinse the jar, and refill with freshly mixed nutrients up to the refill line, not above it — this preserves the air gap you worked to establish. Never keep adding concentrated fertilizer to old water: plants drink water and nutrients at different rates, so repeated top-ups create an invisible salt buildup. The University of Minnesota Extension guide covers this solution-change routine as standard small-scale hydroponic care.
Harvest, Troubleshoot, and Know When to Size Up
Pinch basil just above a pair of leaves when it reaches 6–8 inches tall. Regular harvesting encourages branches and delays flowering. Take no more than about one-third of the plant at once, and never strip every mature leaf.
| What you see | Check first | What to do |
|---|---|---|
| Fine white or cream roots | Nothing — this is success | Keep the routine steady |
| Green film on the glass | Is the sleeve staying on between checks? | Rinse the jar and keep it covered |
| Water dropping fast | Heat and plant size | Refill to the refill line; consider a bigger jar |
| Drooping foliage | Water level and light — not fertilizer | Restore the refill line; move to gentler light if it is a fresh cutting |
| Brown, slimy roots or sour smell | Check before changing: is the air gap intact, or has the jar been topped up too high? | Lower the level to restore the gap; rinse and trim only the clearly damaged roots; refresh the solution |
When to move to a larger reservoir: if roots fill the jar, you are refilling every day or two, or growth stalls despite fresh solution and good light, the plant has outgrown its quart. Transplant the basil — pebbles, net pot and all — into a larger opaque container, or start a fresh cutting in the jar.
Frequently Asked Questions
Can I grow other herbs in a mason jar?
Yes, with the same method: mint, lemon balm, and oregano root readily and stay compact. Woody herbs like rosemary and lavender are poor candidates — they root slowly and dislike constantly wet conditions. Treat basil as the demonstrated project rather than assuming every herb behaves identically.
How long will basil live in the jar?
With regular harvests, fresh solution every one to two weeks, and good light, a jar typically produces for several weeks to a few months. When growth slows despite good care, start a new cutting — the jar is a renewable setup, not a permanent one.
Do I need pH test strips?
Not on day one. If your basil grows well on label-rate nutrients, skip them. Reach for strips if growth stalls, leaves yellow oddly, or your tap water is notably alkaline — basil prefers roughly pH 5.5–6.5 in hydroponic solution.
Is tap water okay?
Unsoftened tap water is fine in most homes. If your water is softened, use a bypass tap, rainwater, or distilled water instead — ordinary filters do not reliably remove the dissolved sodium that softeners add.
Why not just keep the jar topped up?
Because the air gap is the oxygen supply. Topping up to the net pot drowns the air roots, which is the one part of this passive system that has no backup. Refill only to your marked line.
Save the Diagram, Then Build
Save the water-level diagram before you build your first jar. Screenshot it, print it, or tape it to the fridge — it is the one reference that keeps the whole system working. And if this little jar gets you thinking about a bigger indoor garden, our starting seeds indoors guide is the natural next step, plus the free planting calendar below if you are moving into outdoor beds.
Creator note — not part of the tutorial: this project films well in two shots. Open with a slow pass at root level (hook: "Hydroponics can be this simple"), cut to a new jar beside an established one, and end with the sleeve going back on ("Peek at the roots, then keep them dark"). Expose for the roots, not the leaves.