
Why Start Seeds Indoors?
Starting seeds indoors is one of the highest-leverage moves a gardener can make. It gives you a 4–8 week head start on the growing season, dramatically expands the variety of plants available to you (seed catalogs offer 10–50× more varieties than nursery transplants), and costs a fraction of buying established plants.
For slow-maturing crops like tomatoes, peppers, and eggplant — which need 60–90+ days from transplant to harvest — starting indoors isn't just helpful, it's essential in most climates. Without it, these plants simply don't have enough season to produce.
The Complete Equipment List
You don't need expensive equipment to start seeds indoors — but the right basics make a dramatic difference in germination rates and seedling health.
Essential Equipment — What to Buy vs. What to Skip
| Item | What to Look For | Budget Pick | Worth Splurging? |
|---|---|---|---|
| Seed trays | 72-cell plug trays + solid water tray | Any garden centre 10×20" flat | No — all work equally |
| Seed-starting mix | Fine texture, no bark, low nutrient | Pro-Mix BX or Jiffy mix | Yes — don't use potting soil |
| Grow lights | Full-spectrum LED, 2000–4000 lumens | T5 fluorescent 2-bulb shop light | Yes — LED is worth it long-term |
| Heat mat | Maintains 70–80°F soil temp | Any seedling heat mat + thermostat | Yes — especially for peppers |
| Humidity dome | Fits 10×20" trays, adjustable vents | Repurposed clear lid or plastic wrap | No — any cover works pre-germination |
| Labels & marker | Permanent marker, pencil labels | Popsicle sticks + Sharpie | No |
| Spray bottle | Fine mist for delicate seedlings | Any kitchen spray bottle | No |
When to Start: Your Frost Date is Everything
The single most important number in seed starting is your last spring frost date. Every seed-starting calculation flows from it. Here's how to use it:
- Find your last frost date at the Old Farmer's Almanac frost date tool by entering your zip code.
- Look at each seed packet — it will say something like "Start indoors 6–8 weeks before last frost."
- Count backward from your frost date to get your sowing date.
- Write your complete schedule before you buy a single seed packet.
Seed Starting Calendar — Weeks Before Last Frost
| Weeks Before Last Frost | What to Start |
|---|---|
| 12–14 weeks | Onions, leeks, celery, celeriac (very slow) |
| 10–12 weeks | Peppers, eggplant (need long warm season) |
| 6–8 weeks | Tomatoes, basil, annual flowers (impatiens, petunias, marigolds) |
| 4–6 weeks | Broccoli, cauliflower, cabbage, kale, lettuce, spinach |
| 2–4 weeks | Cucumbers, squash, melons (fast germinators — don't sow too early) |
| Direct sow only | Carrots, beets, radishes, beans, peas, corn (do not transplant) |
Step-by-Step: Sowing Seeds Correctly

1. Pre-moisten your seed-starting mix
Before sowing, moisten your mix thoroughly in a bucket. Squeeze a handful — it should hold its shape but release only a few drops of water. Dry mix repels water and leaves seeds exposed; overly wet mix suffocates them. Pre-moistening is far more even than trying to water after filling cells.
2. Fill cells and firm gently
Fill each cell to the top, then press down gently with your fingertip to firm the mix. There should be no air pockets — seeds in air pockets don't make root contact and fail to germinate. Refill and firm again if needed.
3. Sow at the correct depth
The golden rule: sow seeds at a depth of 2–3× their diameter. Very tiny seeds (like petunias, basil, or begonias) are simply pressed onto the surface and left uncovered — they need light to germinate. Always read the packet for light requirements.
4. Label every tray immediately
This step sounds obvious but is skipped constantly. Two weeks after sowing, a tray of unlabelled seedlings is completely unidentifiable. Use permanent marker and include the variety name, sowing date, and target transplant date. Labels saved many harvests.
5. Water gently and cover
Mist the surface gently with a spray bottle — heavy watering dislodges tiny seeds. Place a humidity dome or plastic wrap over the tray. This maintains moisture and warmth during the critical germination window.
6. Apply bottom heat
Place trays on a seedling heat mat. Most seeds germinate significantly faster and more uniformly at 70–80°F soil temperature. Peppers in particular are extremely temperature-sensitive — below 65°F they germinate sporadically or not at all.
7. Check daily — remove dome at first sprout
Once you see the first sprout in a tray, remove the humidity dome immediately. Seedlings under domes quickly become leggy, etiolated, and prone to damping off fungus. Move to strong light right away.
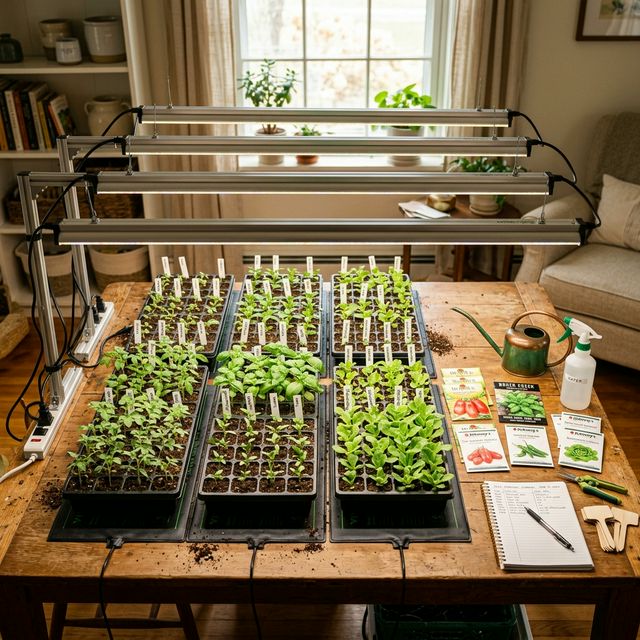
Grow Lights: The Single Most Important Variable
The number one reason indoor seedlings fail is insufficient light. A windowsill — even a south-facing one — provides only a fraction of the light intensity seedlings need. The result: leggy, pale, weak plants that struggle or die when transplanted.
Here's what you actually need:
- Intensity: 2,000–4,000 lumens per tray minimum. Full-spectrum LED grow lights or T5 fluorescents work well.
- Duration: 14–16 hours on, 8–10 hours off. Use a timer — consistency matters more than total hours.
- Distance: Position lights 2–3 inches above the seedling tops. Raise the light as plants grow. Most seedling problems labeled "too much light" are actually heat problems from the light being too close.
- Spectrum: Full-spectrum or "daylight" (5000–6500K colour temperature) for vegetative seedling growth. Avoid single-colour "blurple" LEDs — they're inefficient and produce inferior growth.
Watering & Feeding Seedlings
Watering: The goal is consistently moist — never soggy, never dry. Bottom watering (pour water into the solid tray beneath the plug tray and let it wick up) is far superior to top watering: it encourages roots to grow downward, avoids disturbing delicate seedlings, and keeps the surface drier which dramatically reduces damping off.
Feeding: Seed-starting mix contains little or no nutrients by design — this is correct for germination, because seeds have all the energy they need to germinate. Once seedlings develop their first true leaves (the second set, after the initial cotyledons), begin liquid feeding at ¼ strength weekly with a balanced water-soluble fertiliser (e.g. 10-10-10 or a seedling-specific blend).
Seedling Problem Troubleshooter
| Symptom | Cause | Fix |
|---|---|---|
| Tall, thin, falling-over stems | Not enough light (etiolation) | Move lights to 2–3" above; increase duration to 16 hrs |
| Seedlings collapse at soil level | Damping off fungus | Improve airflow; don't overwater; use sterile mix; remove dome sooner |
| No germination after 2 weeks | Too cold, old seed, too deep | Check soil temp (70°F+); test seed viability; check sowing depth |
| Yellow lower leaves | Nitrogen deficiency | Begin ¼-strength liquid fertiliser at first true leaf stage |
| Purple undersides on leaves | Phosphorus deficiency (often cold roots) | Warm up root zone; start light feeding |
| White crusty deposits on soil surface | Salt buildup from fertiliser | Water thoroughly from top once to flush; reduce fertiliser |
| Fungus gnats flying around soil | Overwatering, wet surface | Bottom water only; let surface dry; yellow sticky traps |
Potting Up: When and How
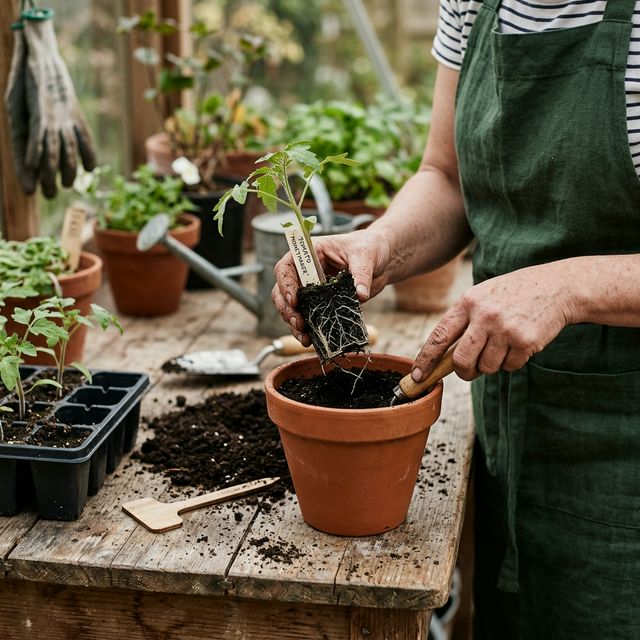
Potting up means moving seedlings from small plug cells into larger containers as they outgrow their space. Signs it's time:
- Roots visible through drainage holes of plug cells
- Plant drying out within 24 hours of watering
- Growth has slowed despite good light and fertiliser
- Plant looks disproportionately large for its container
When potting up, move to the next size up — roughly doubling the volume at each step. Going too large too fast leads to waterlogged soil in the outer zone where roots haven't reached yet.
Special tip for tomatoes: You can bury tomato stems deeply at every pot-up — all the way up to the lowest set of leaves. They form roots along any buried stem, creating an exceptionally strong, deep root system by transplant time.
Hardening Off: The Final Critical Step
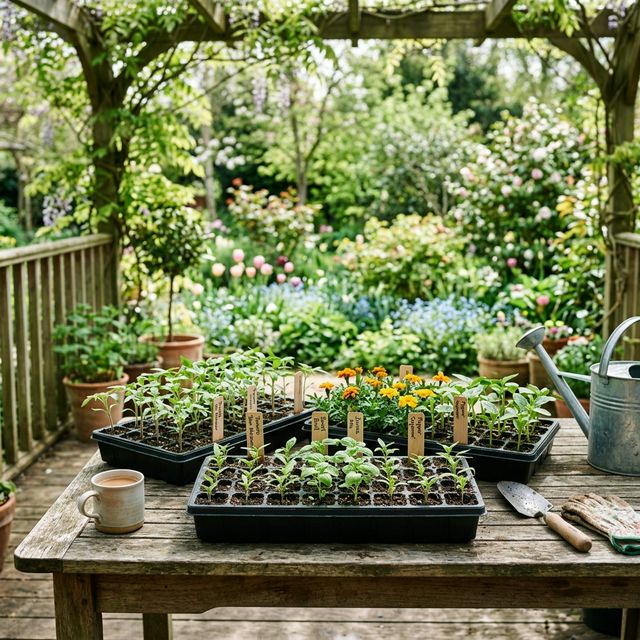
Hardening off is the process of gradually acclimating indoor-grown seedlings to outdoor conditions — wind, temperature fluctuation, and especially much more intense sunlight. Seedlings grown under even the best grow lights receive only 20–30% of outdoor light intensity. Moving directly from indoors to full sun causes severe sunscald and often kills plants.
The 10-Day Hardening Off Schedule
- Days 1–2: Place in full shade outdoors for 2–3 hours. Bring in before temperatures drop below 50°F.
- Days 3–4: Full shade, 4–5 hours outside. Watch for wilting — wind causes more stress than sun initially.
- Days 5–6: Morning sun (1–2 hours), then shade for the rest of the time outside.
- Days 7–8: Half day of sun, half day of shade. Begin leaving out slightly longer.
- Days 9–10: Full day outside including full sun. Bring in only if frost is forecast.
- Day 11+: Ready to transplant into the garden.
Transplanting Day: Setting Seeds Up for Success
Transplanting day is a big moment — months of careful work come together. Here's how to get it right:
- Transplant in the evening or on a cloudy day — not midday in full sun. Heat and sun stress newly disturbed roots before they've re-established.
- Water thoroughly the day before transplanting so plants are fully hydrated and soil holds together as a plug when removed from cells.
- Add compost to the planting hole — a handful of well-aged compost gives roots an immediate nutrient boost.
- Plant at the same depth as they were in their pot — except tomatoes which can go much deeper.
- Water immediately after planting — a thorough drink settles soil around roots and eliminates air pockets. Add a liquid fertiliser (fish emulsion or kelp) to the first watering for an additional boost.
- Protect for the first week — a floating row cover (even just overnight) protects from wind, late frost, and pest pressure while roots re-establish.


